This is absolutely not a modification for the faint of heart- you will have most of your interior apart doing this modification, and you are strongly encouraged to seek the services of a professional glass installer to safely and securely install your new rear window. You will not need a great deal in the way of tools, but you will need some basic sockets, wire strippers, wire, crimps/connectors, and the like to pull this modification off. My deepest thanks to Craig2000RS from the NASIOC Forums for providing some photos I regrettably lost in the process of writing up this modifications page- it would not have been possible without him. If you should have any questions, please feel free to ask them here.
Your first step is going to be getting a glass company to install your rear window. If you do not have a full day to devote to this modification after the glass is installed, you should skip ahead to the physical install of the wiper motor/arm portion of this page so you can weatherproof your car. The physical wiper motor install should not take much longer than 30 minutes or an hour. If you have enough to continue or are picking up on the project on another day, you can continue below.
Now begins the wiring confusion. I have the full diagram for the wiper setup located here for you to look at if need be. The pertinent connectors have been highlighted in similar colors on that image, but I hope the diagram I have below might clarify things where the wiper motor and relay are concerned.
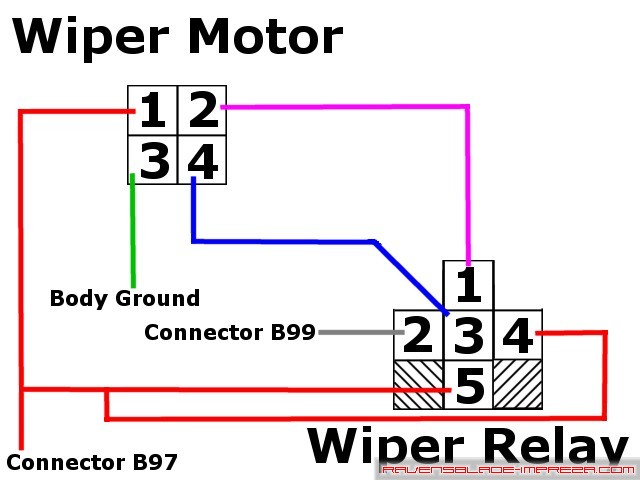
It is fairly easy to see which wires connect to what between the motor and the relay, with the exception of the mess in red. Essentially, I took the wire from the motor and soldered it directly to pin 5 on the relay. I then took the wires coming out of pins 5 and 4, twisted them together, and added a single crimp connector to the end of the two twisted wires. It might get a little bit confusing, so here is a photo of the completed (though installed) finished product:
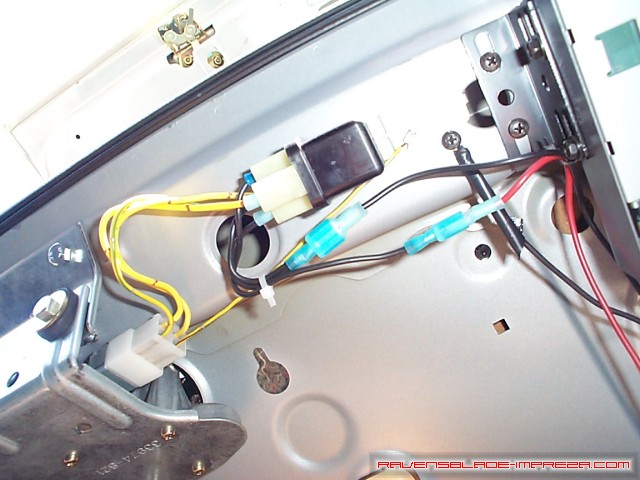
See how two of the wires from the relay go into that one connecter the black wire from the right is connected to? That is what I am getting at. With the relay prepared, we can now get to work on the remainder of the wiring.
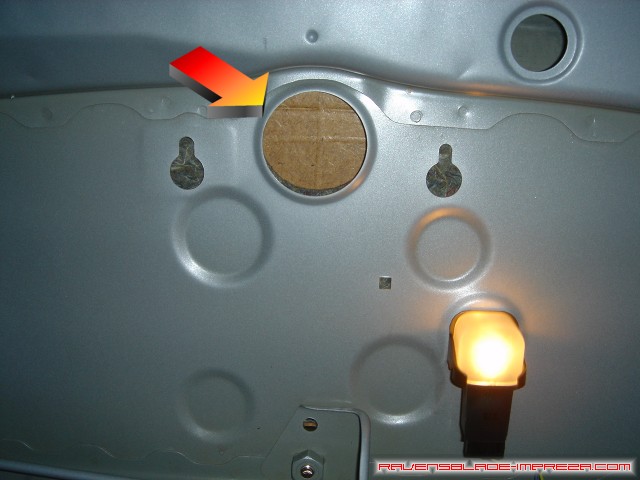
Open your trunk, and look upwards at the bottom of the rear parcel shelf. You should see a large hole in the metal part of the shelf, right in the center and below where a third brakelight in the back window would be. Take a permanent marker, and trace the outline of this hole on the panel that is above it (the brown color in the photo). This is where the hole for the wiper will be drilled.
Moving along, it is time to remove your back seat. This goes the same for coupes or sedans- you start by removing the two 12mm bolts holding the seat bottom in. There is one in each rear passenger footwell area. With those two bolts out, push down in the center of the seat and pull forward. You need to dislodge the bottom cushion from the hook on the back cushion (you can see this hook in the next photo, right below the bolt). The seat is very light and easy to remove at this point.
There are three 12mm bolts holding in the rear seat. This is the center one, with the hook for the seat botoom.
This is the passenger side bolt location.
This is the driver side bolt location. When all bolts are out, pull the seat back straight up towards the roof and forward, and it will come right out. This cushion is also very light, much like the seat bottom.
Next, turn your attention to the child seat tethers. There are three of them on the rear deck, and they have plastic covers you can pull off with your fingers.
Under the covers, there is a 13mm bolt holding the anchor to the rear deck. Remove all three bolts and put the anchors and covers aside. Now, you can pull up on the center of the carpeted cover over the metal rear deck. If you tug enough, it will pull the cover out from under the trim pieces on the side (above your seat belt tensioners). You can remove this interior trim if you want, but the cover pulls out easy enough without doing so. After pulling the cover out, cut out the hole we traced earlier; you can do this with a hole saw on a drill, a Dremel, or even a sharp utility knife. Replace it in the car after cutting out the hole. You might say "why couldn't I just cut the hole without removing this damn piece of trim?" and I say "because you don't want to break your utterly irreplaceable glass in the process by accident." Better to be safe than sorry.
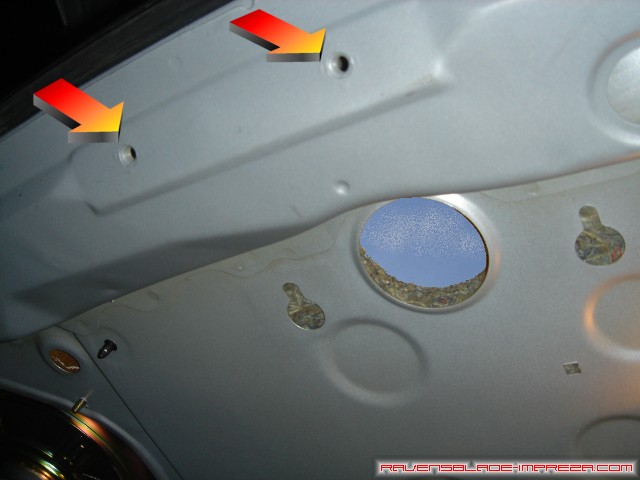
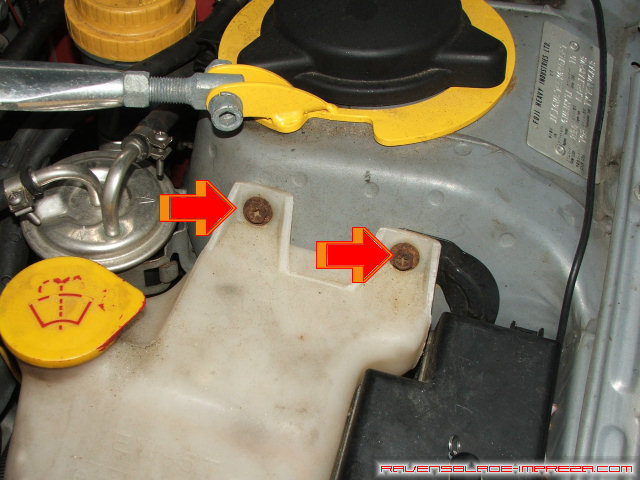
In this photo, you can see the hole we just made, as well as the two mounting points for the motor.
There is no great way to show how the seals and wiper go through the window, as the seals and wiper get in the way of taking a photo when you put them in. Basically, you will put the wiper stalk up through the hole in the metal parcel shelf and the carpeted part we cut earlier, and then bolt the wiper motor to the metal parcel shelf. Everything else takes place from outside the car. Now, put the outer seal over the stalk, making sure to push the spray tube section alongside the motor shaft. You may not have gotten any tubing with your spray nozzle, or you may have gotten a piece about 8" long. If you have a piece, great, if not, attach a piece to the nozzle. It can be short, or it can be a huge reel of it- you will need about 20 feet of it in the long run- the engine compartment is a long way from the trunk!
Push the outer seal down snugly over the wiper stalk.

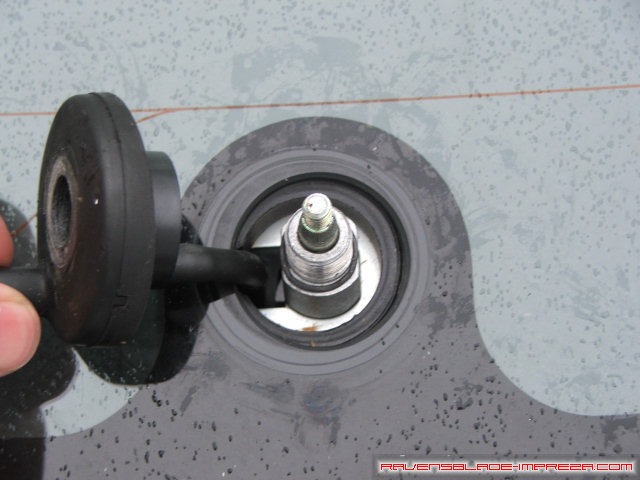
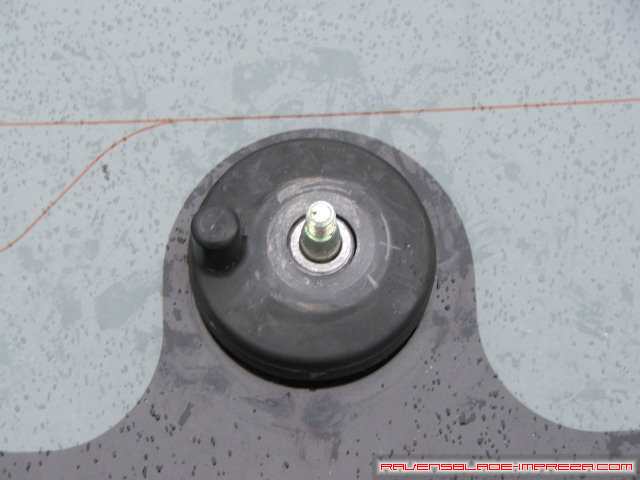
Next, tighten down the large nut which seals the window seal halves to the glass. It is critical to not overtighten this nut! You may crack the glass! Snap the plastic cover over this nut when done.
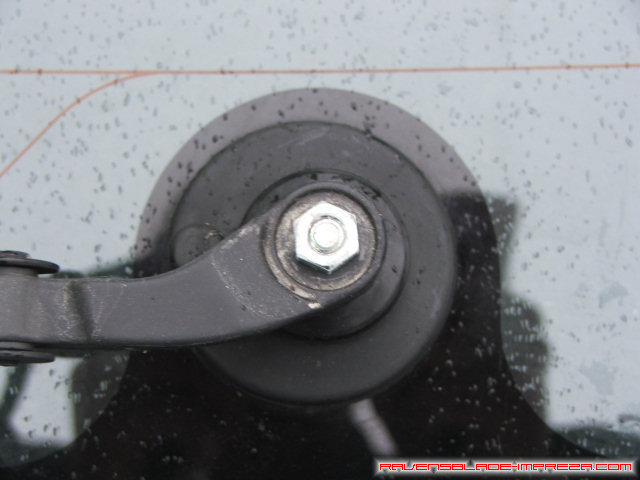
Next, put the wiper arm over the motor shaft. Align the wiper arm so it is relatively horizontal, and tighten down this 10mm nut.

Finally, snap the wiper arm cover over the nut.

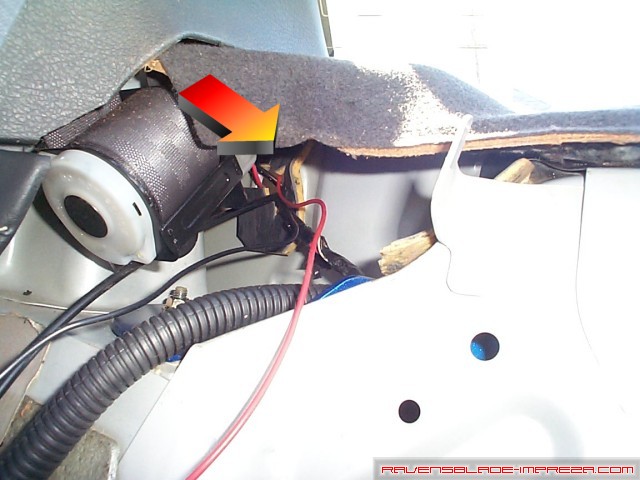
In the trunk, I mounted the relay setup we made earlier by drilling a small pilot hole and then screwing it into the metal with a self-tapping screw. I killed two birds with one stone by grounding the motor (pin 3 on my diagram up above) with this same screw- I just put the screw through the ring terminal already on the wiper motor connector and tightened things down. You can now connect this relay harness to the wiper motor.

After things are prepared in the trunk, I turned my attention to the front passenger floorboard area, and the trim along the door. Pull out the plastic push rivets with a small screwdriver. There are two on the inside of this trim panel.
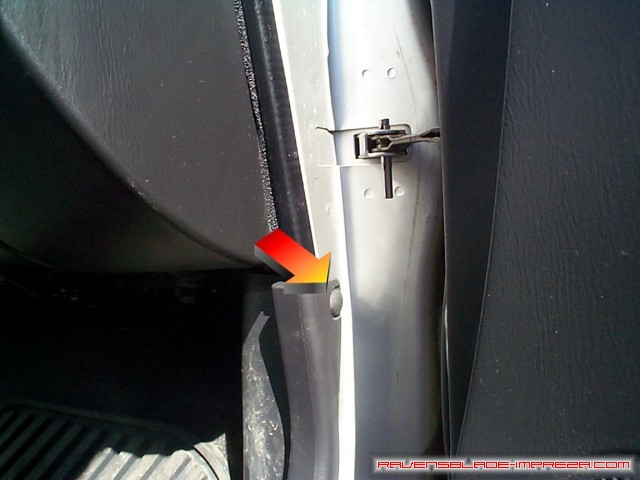
One more push rivet holds this trim piece in, and it can be found just around the bend on the outside.
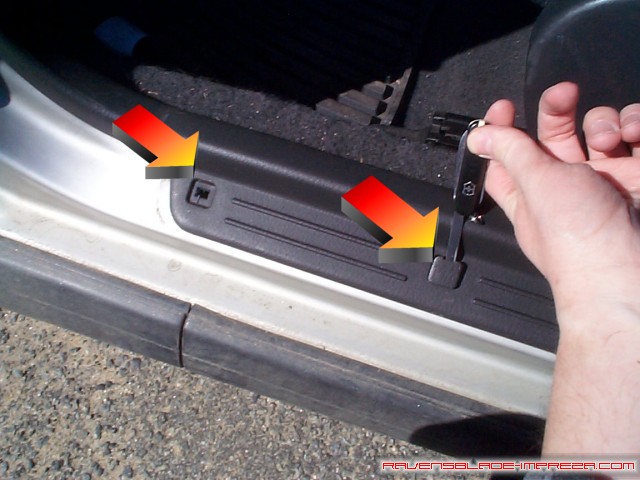
With those out, start pulling out the square plugs on the kick plate. There are a few of them, and they come out the same way with a small screwdriver.

Two final pop rivets hold the last bit of the kick plate trim in, back in the rear footwell area, where the carpet meets the bottom of the back seat. Pull these both out, and all the trim from the door area should pull out easily.
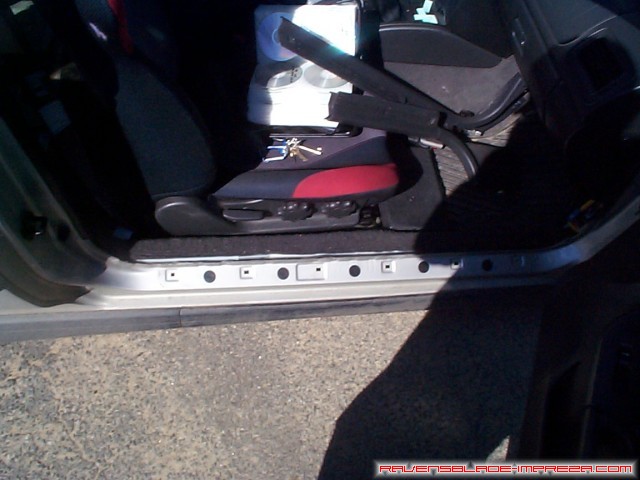
The area in question, bare of all trim.
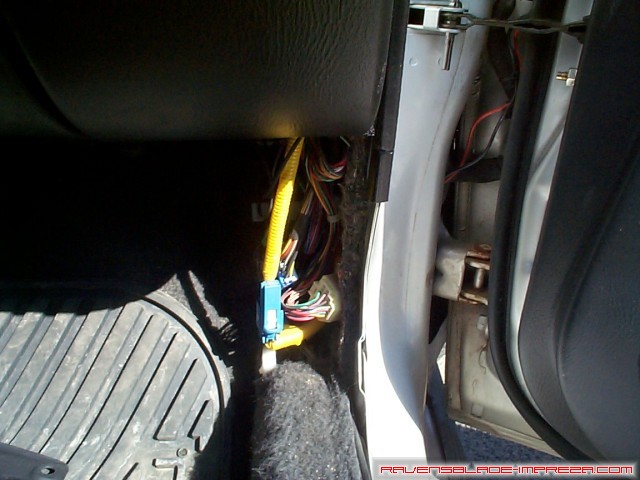
This is where we will eventually be connecting the two wires that run back to the relay. The connectors are large and there are dozens of wires there, but it is not too bad when you focus on just the connectors and two wires we need. I am going to skip this step for now, as connecting them will make everything "live" and working. I feel this step is best saved for last, and should be done with the battery disconnected; these connections were the very last step I undertook doing this modification, so I am skipping them for now.

Start running wires back along the door sill, leaving 8 inches or so extra near where we will be making the connections to the body harnesses. This leaves enough length to work with, and leaves enough slack so the wires do not pull on those connections when completed. I chose red and black, but any colors will do. I strongly suggest using two different color wires, as it will make it much easier to figure out what wire is what when we wire it to the relay and to the body harness. You can run it under the carpet, in the channel next to the carpet, or wherever- just start getting it back towards the rear seat.
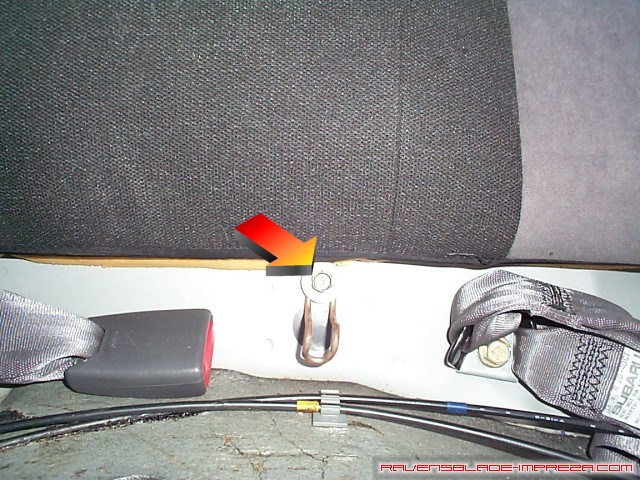
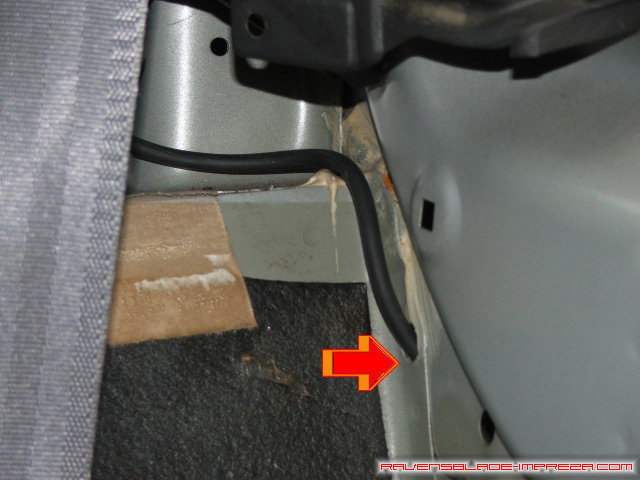
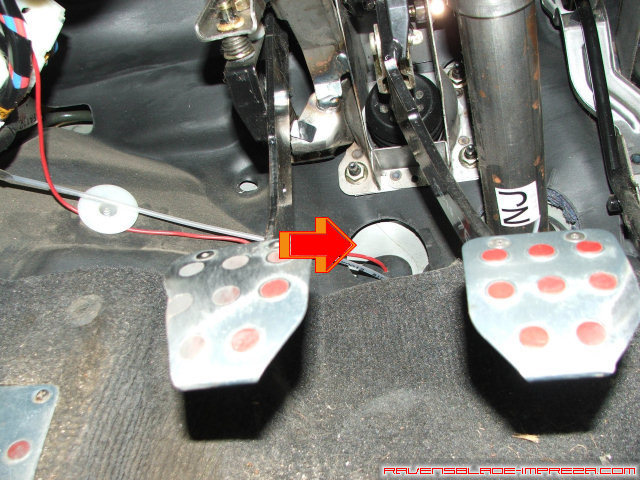
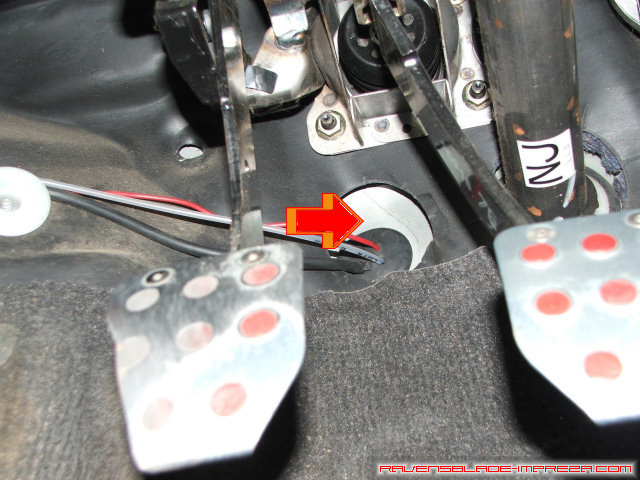
Continue tucking and running wire until you reach the back seat. In the corner by the seat belt tensioner on the passenger side, you should see a small pass through to the trunk. A few wires may be going through there, the trunk release cable, and the gas door release cable if you've done the locking gas door mod. Push your wires through here and into the trunk. Cable tie or tape down the wires to keep them snug.

This is where the wires will come through from the cabin.

Start running the wires along underneath your rear deck, using the existing points for your speakers. Head the wires towards the relay you installed earlier.
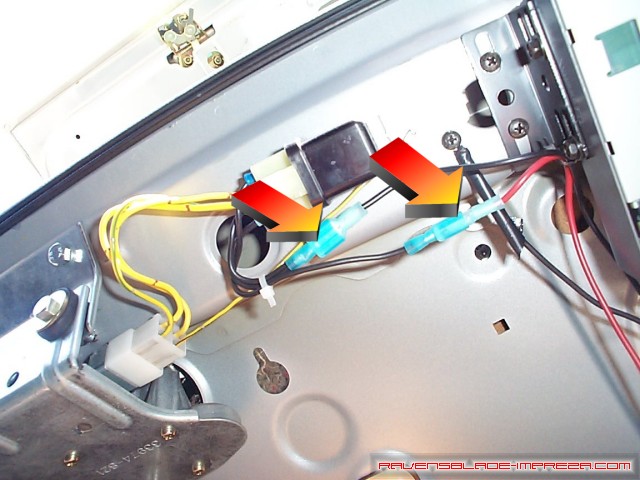
I have added quick connects with a crimp to the ends of my wires, and I have connected the dual wire from the relay to the black wire and the single wire on the relay to the red wire. Again, it does not matter what color you connect to what, just remember what is connected to what, as it will be important later.
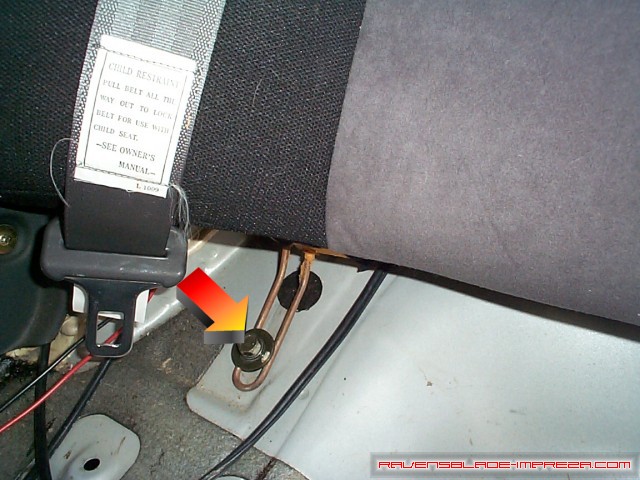
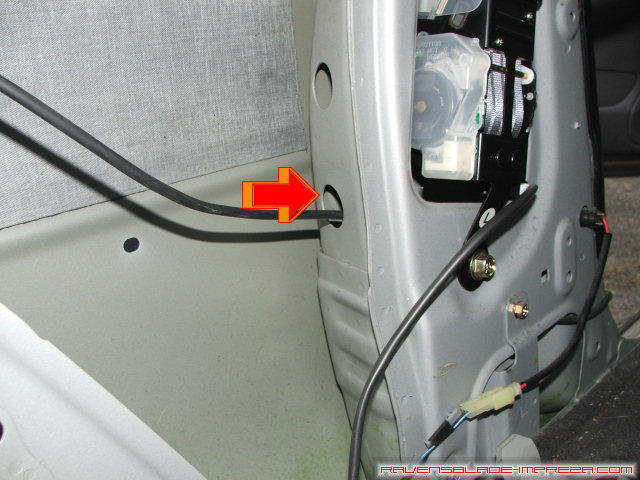
Whether you attached a tube or ran a long length of tubing from your wiper motor, now is the time to start running that tubing towards the front of the car. Remove your driver side door sills like you did when running the wires. I ran my tube to the left corner of the trunk, and through this hole behind the seat belt tensioner.
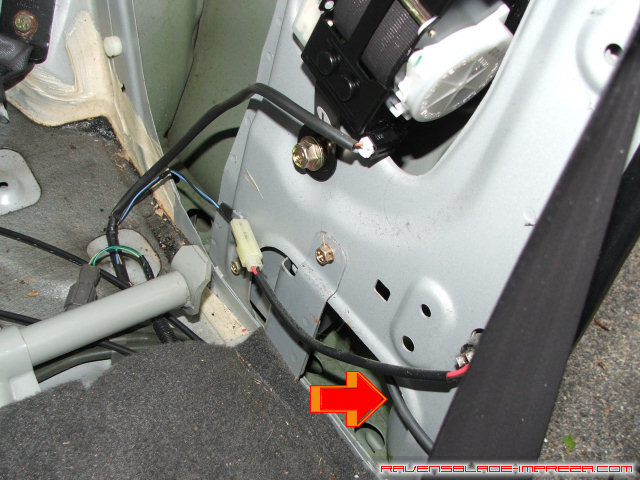
I wanted to keep the tubing away from the interior trim to prevent pinching, so I ran it into this dead body space.
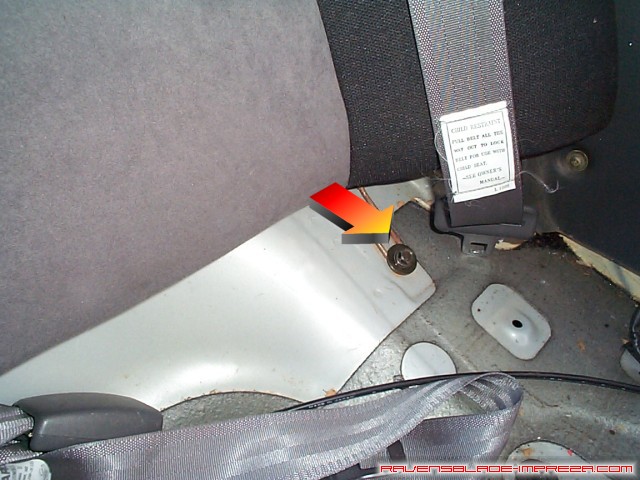
Next, I routed the line into the area where the seatbelt tensioner.
Next, I routed the line into the space similar to the one used to route the wires earlier.
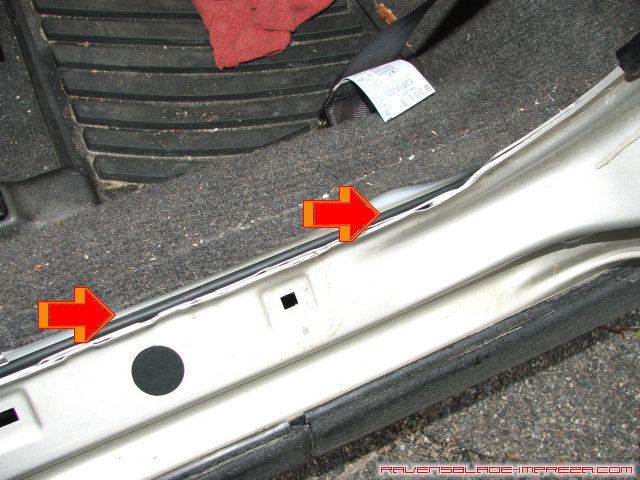
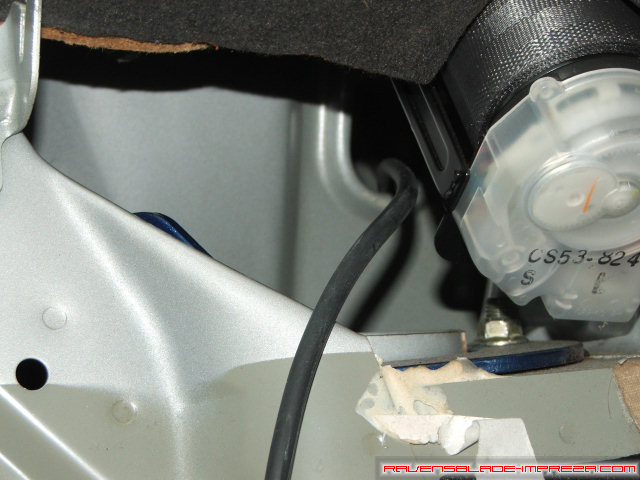
Here, you can see the tube run in the channel.

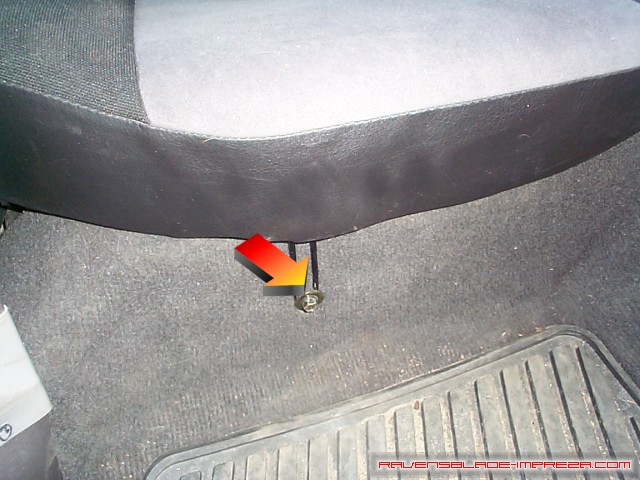
Once you have the tube run all the way to the area by the dead pedal, you can reattach your plastic trim.
The OEM location for running the tube is in the same location that the fuel lines run through the firewall. This place would be great, only it is very hard to get to in the engine bay, and even harder to get the tube through the mess in the dash. I will use this knockout, where I have run the line for my boost gauge and oil pressure gauge in the past. What's this knockout for you ask? If your car was right hand drive, your engine wiring harness would run into your ECU through here.
Cut a hole, push the tube through, make sure the knockout is snugly still in its proper place, and head into the engine compartment.

the tube will come out on the engine apron, just below your brake booster.
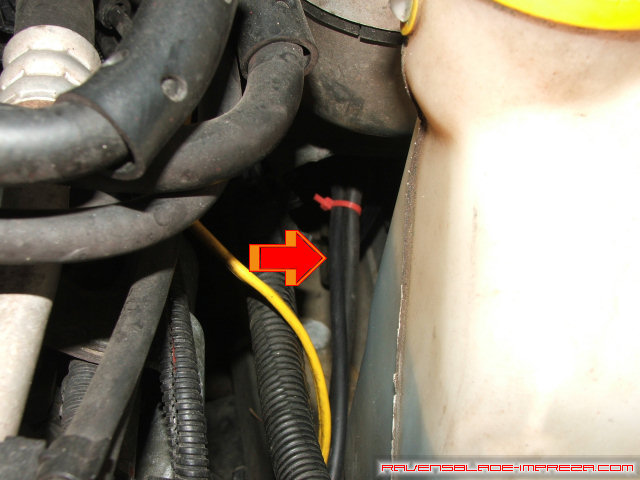
I ran the tube along the apron until I came upon the tube running up to the windshield. I zip tied them together (not too tightly) at this point.
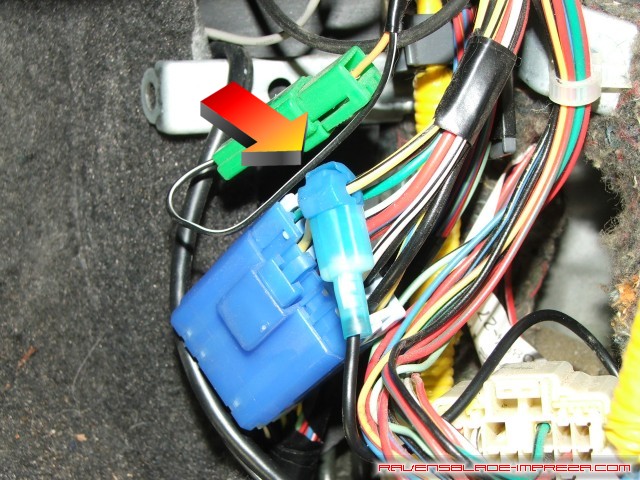
Run the tube forward and towards the front middle of the existing washer bottle. Here, you should find the existing second wiring harness for the rear spray nozzle. Thank you Subaru for prewiring!
Next, you will need to remove the existing bottle. Remove these two 10mm bolts- they tend to get rusty as you can see, so some PB Blaster may be in order to free them up.
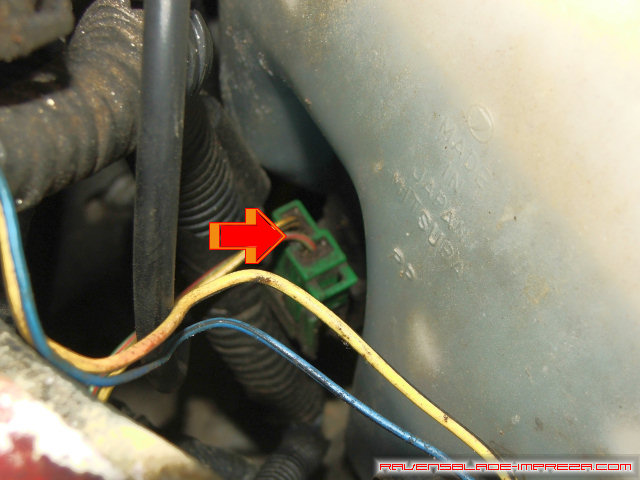
Remove the green connector that is attached to your washer motor now.
Next bit is putting in the bottle.
Okay, back to the final wiring- at this point, it would be best to disconnect the battery, just in case. These connections will make everything "live" and it is best to err on the side of caution.
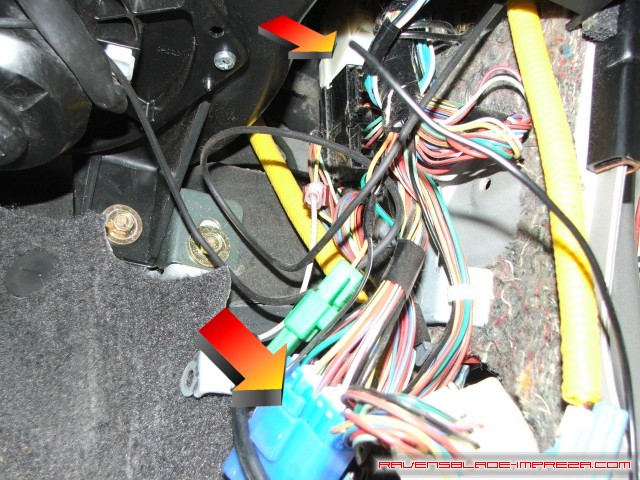
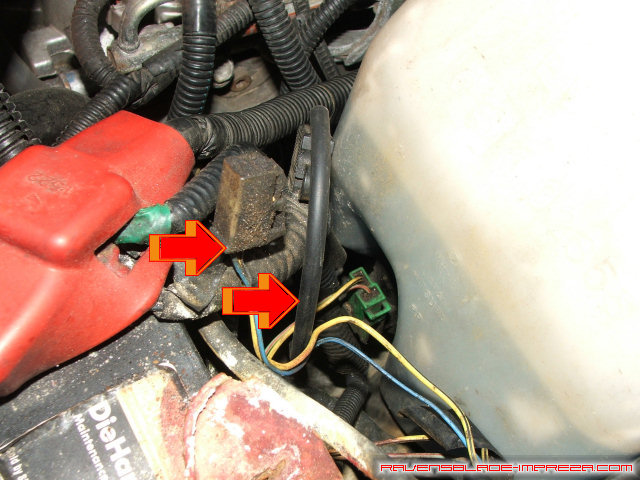
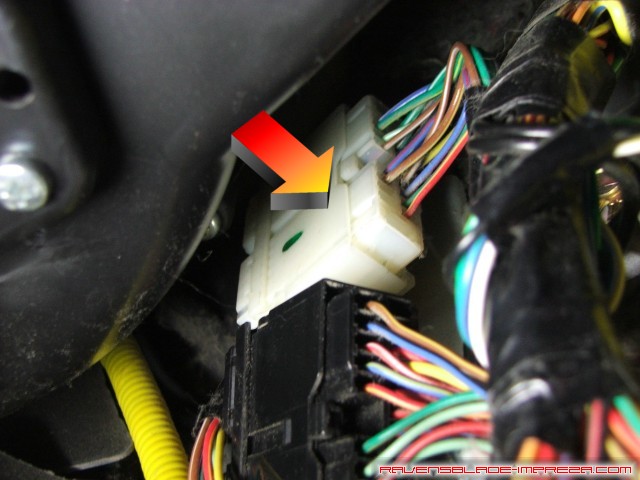
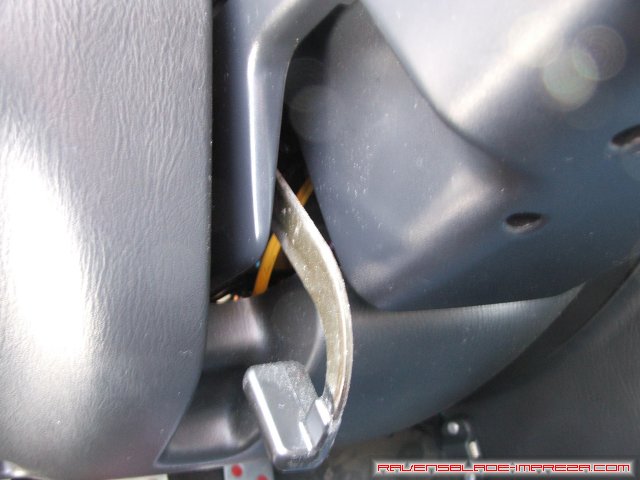
Here, you can see the two connectors from the diagram- B97 in the diagram is the blue 10 pin connector in the bottom of this photo, and B99 is the 20 pin white one way at the top.

Here, you can see the wire in pin 2 on connector B97- on the 2000 Impreza, it is a yellow and black wire.
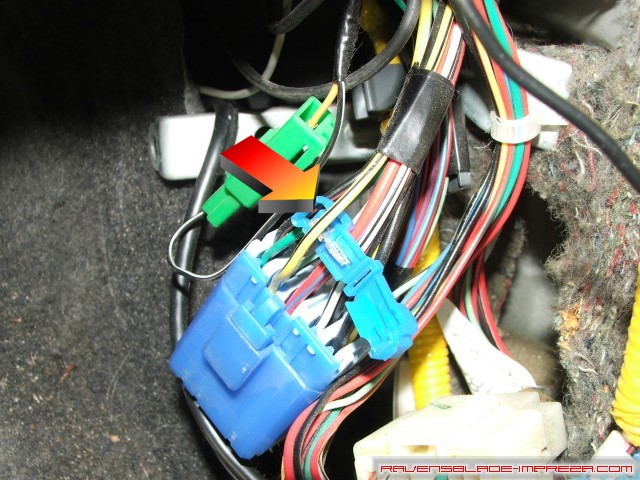
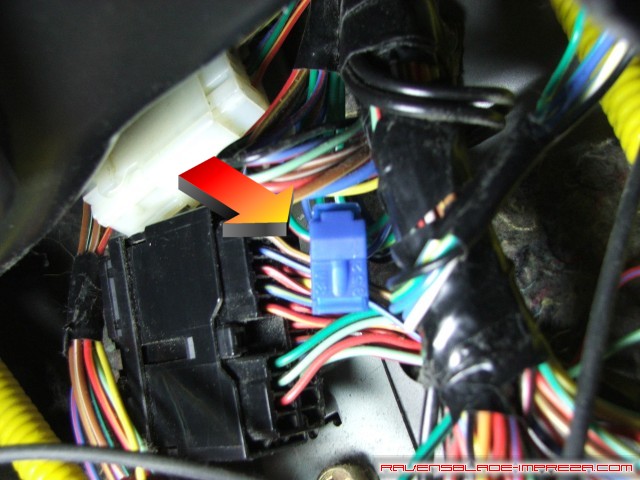
For ease of tapping this wire, I used an electrical tap; place one side under the wire, close the cover, and crimp down. The tap nicks the wire and completes the connection.
Now, simply slide the other half of the tap over the end. Note that the black wire we had run earlier connects to this tap. The red wire running forward from the relay in the trunk will be tapped into connector B99 next.
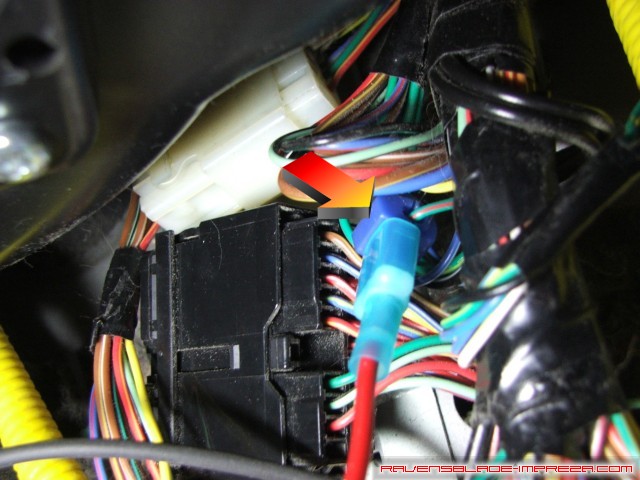
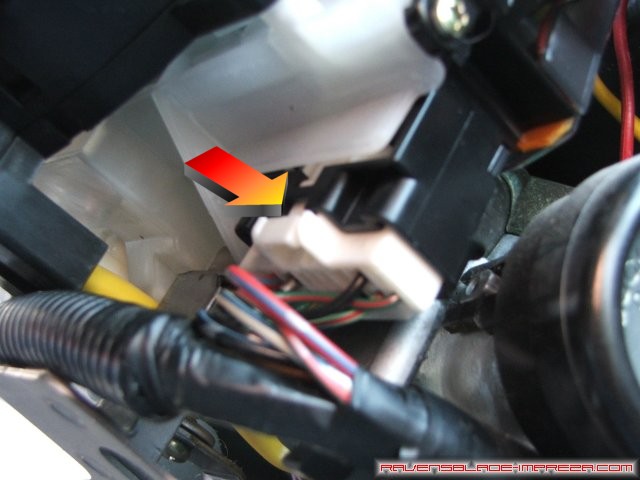
Connecter B99 is way up next to the blower motor, making it difficult to get at. What I did was trace the wire out of the pin I needed (pin 19), which on my 2000 RS is a red and green wire. Further down in the wiring harness, it was much easier to find and tap the wire- there was just more room to work.
It is a little hard to see, but I tapped into the red and green wire like I did before, only a few inches down the harness, in this location, instead of right at the connector.
Close the crimp and connect the red wire from the relay in the trunk to this electrical tap. This (thankfully!) completes all the wiring! You may now reassemble your interior by replacing your seats and the trim around the door. At this point, we will move on to installing the wiper switch.
Time for the wiper switch- since we are going to the trouble of putting in a wiper stalk anyway, we might as well do the intermittent wiper modification. If you own a 93-96 Impreza, the part number you need is 83113AA520, and if you have a 97-01 Impreza, the part number you need is 83114AE130. With that part in hand, move over to the driver side of the car, and pull down the tilt handle if you have a height adjustable steering column.

Now, remove the three phillips screws on the bottom of the column cover. Pull the bottom half off and raise the top half about an inch. The top does not need to be completely removed.
Next, undo the connector found directly below the wiper stalk. Push in the lock and pull down on the connector. You can use your screwdriver to make things easier.
Remove the two screws holding the stalk in, and remove the stalk by pulling down and to the right.
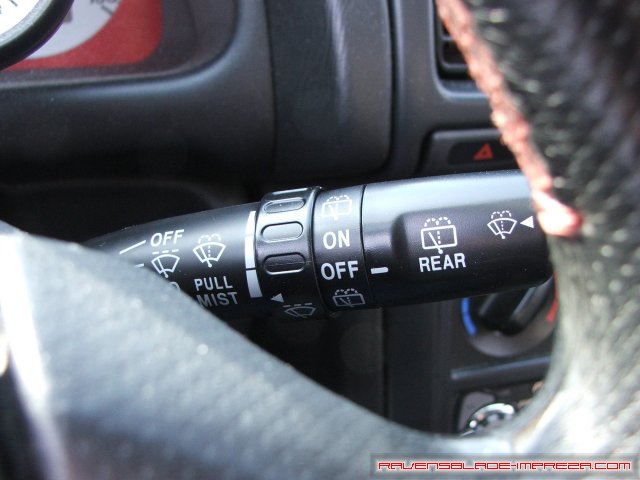
Reverse the few steps above, and you will be done with this modification. As an added bonus, the wagon wiper stalk gives you fully intermittent wipers up front!
|
|
