Since I had nearly the whole car apart and a good deal came up, I decided to throw in a bolt in cage. The chassis stiffening is phenomenal, and I have not even driven the car yet. I can get the whole car to move just by grabbing the bar and rocking, and I can jack up the car at the back and the doors shut properly now. Well worth the trouble already. Please note that my interior is completely dismantled, though it is not necessary to remove anything other than the front and rear seats plus pull back the carpet to install this. The center console can stay, as well as your rear cards (if you have a coupe). You will need 14mm sockets, a drill, 3/8" drill bit, and loads of patience to get the job done. I highly recommend getting some FIA approved padding to cover any areas of the bar in proximity to your head or the heads of your passengers. It is an additional expense, but worth it for safety's sake. The Autopower part number for this bar (coupe with sunroof) is 52804. If you should have any questions or comments, feel free to email me.
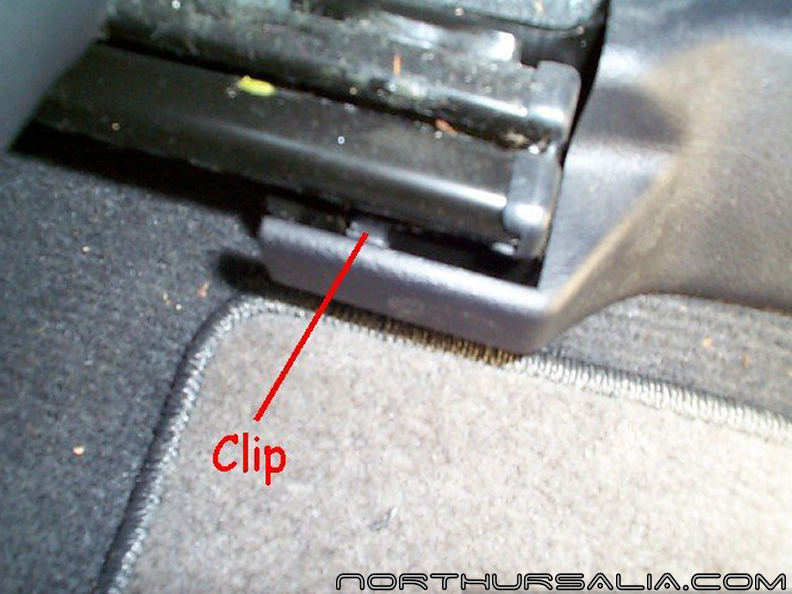
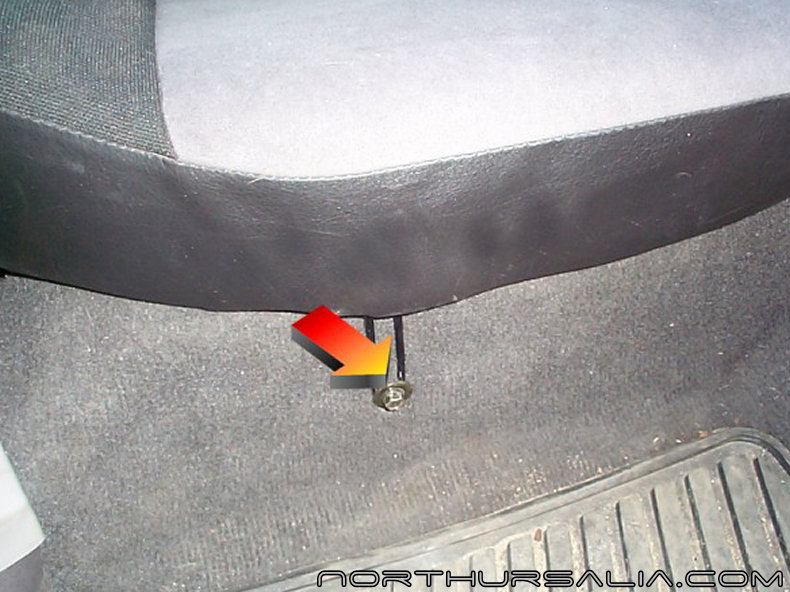
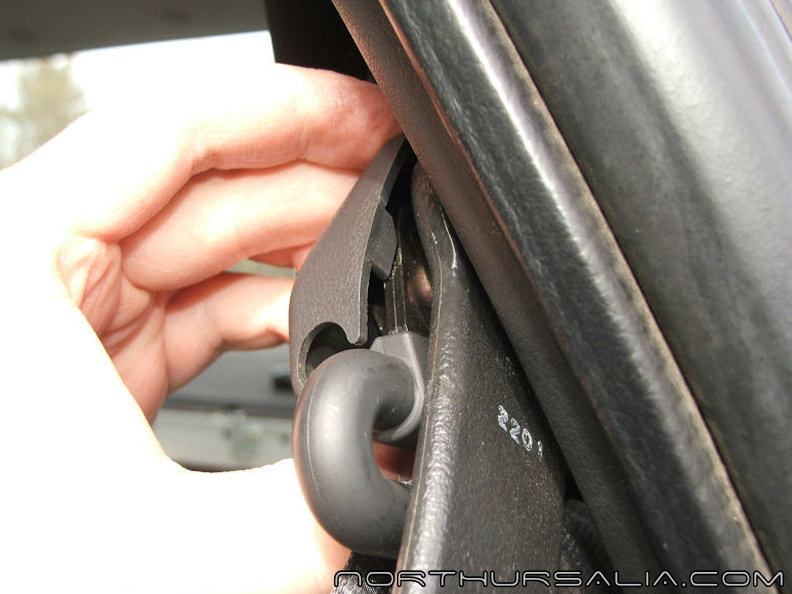
I am going to start this off with the driver side seat- the passenger side is just a mirror image of the driver side. There are four bolts per seat, and all you will need to remove them is a 14mm socket wrench. Two of the bolts are plainly visible- those by your feet when you are seated. There are two more bolts in the back seat footwell area. They are both covered by plastic trim pieces. The one pictured above is the driver side cover on the transmission tunnel. You need to pull back on the leading edge of it (towards the door)- it has a clip going into the seat rail, which you can just see in the picture above. After getting that out, simply slide the cover back towards the rear seat, and it will come off.
A view of the first of four 14mm bolts holding the seat in. Remove this bolt.
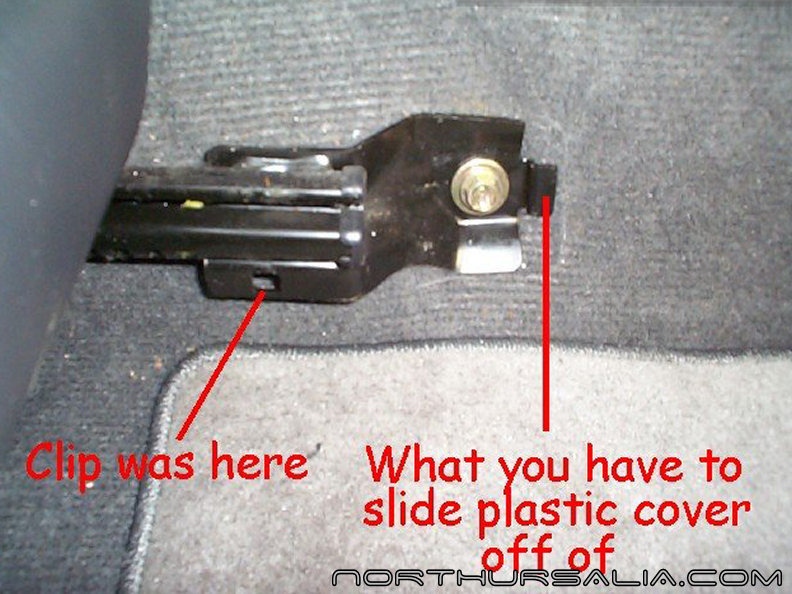
This is the plastic cover over the rear of the driver side seat rail closest to the door- it has two tabs on it that need to be pulled before pulling the cover straight back. Pull this tab from here...
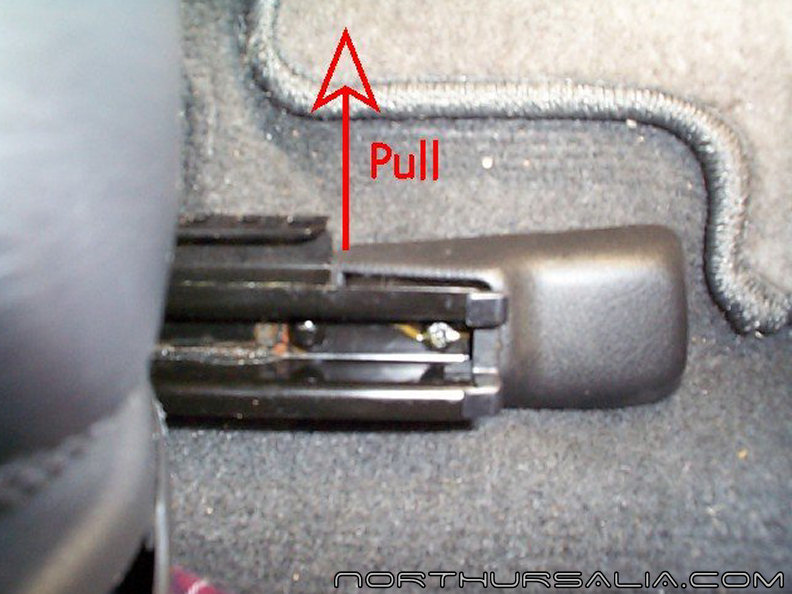
...and this one from here.
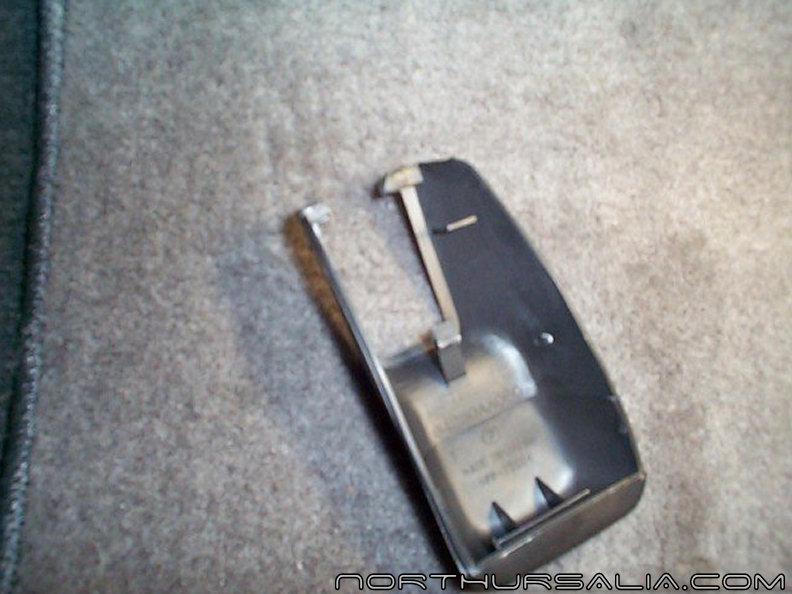
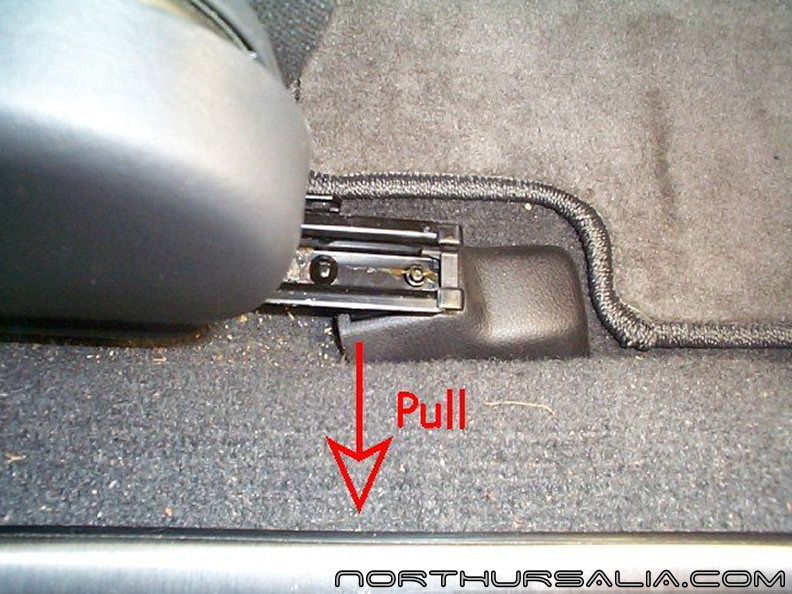
This is a view of the back side of the cover, to give you a better idea of what you are pulling out.
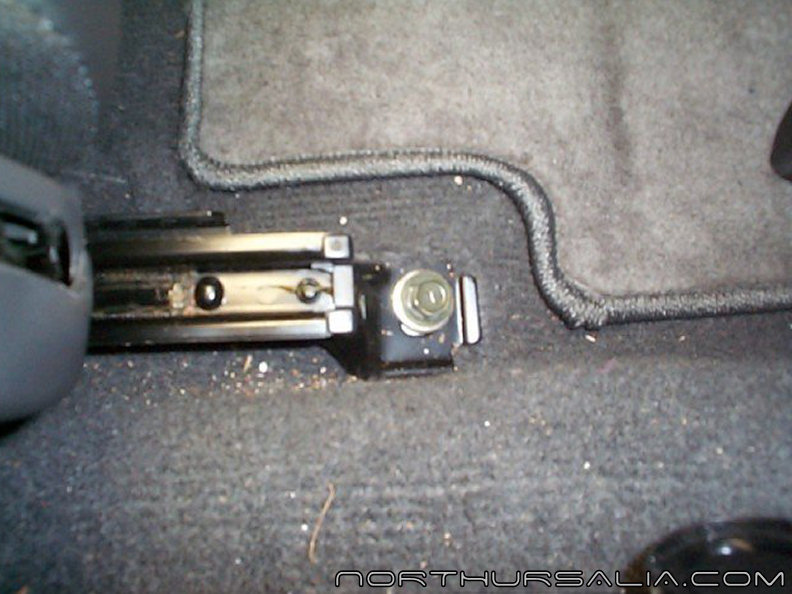
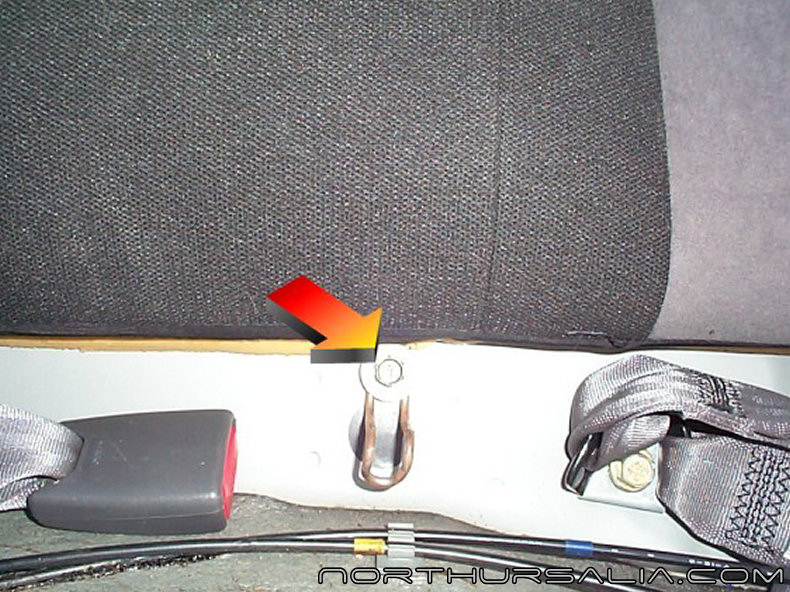
With the plastic cover removed, the second 14mm bolt is visible- remove it as well.
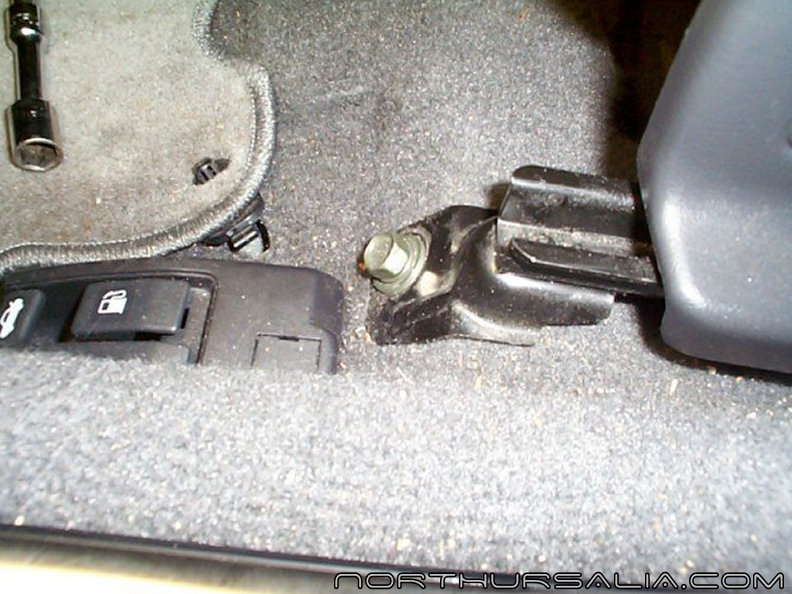
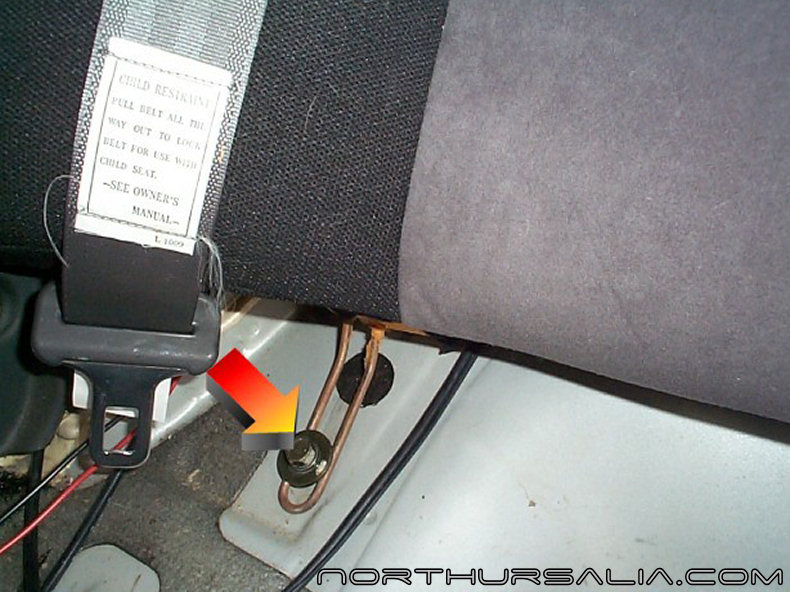
The third of the 14mm bolts is found right near the trunk pull- remove this bolt.
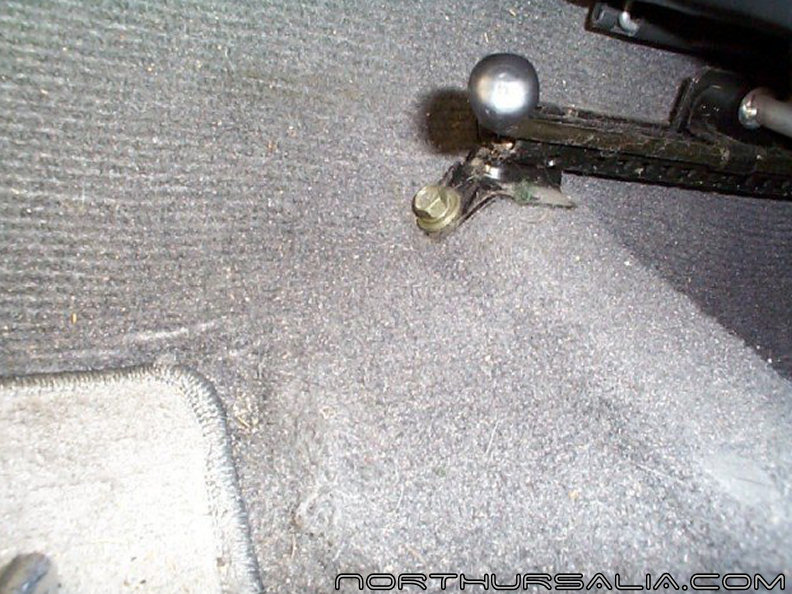
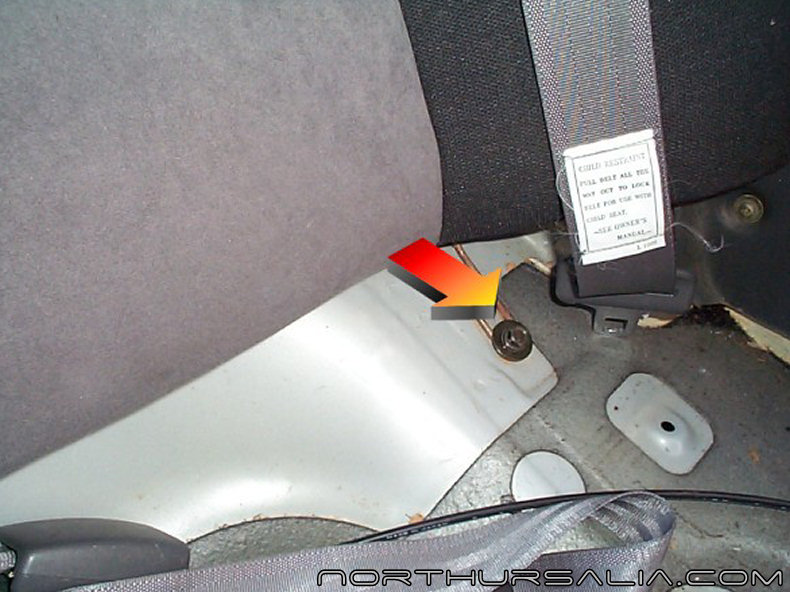
The last bolt will be found right by the seat adjuster handle- remove it as well. With those four bolts out, the whole seat will come right out of the car.
Moving along, it is time to remove your back seat. This goes the same for coupes or sedans- you start by removing the two 12mm bolts holding the seat bottom in. There is one in each rear passenger footwell area. With those two bolts out, push down in the center of the seat and pull forward. You need to dislodge the bottom cushion from the hook on the back cushion (you can see this hook in the next photo, right below the bolt). The seat is very light and easy to remove at this point.
There are three 12mm bolts holding in the rear seat. This is the center one, with the hook for the seat botoom.
This is the passenger side bolt location.
This is the driver side bolt location. When all bolts are out, pull the seat back straight up towards the roof and forward, and it will come right out. This cushion is also very light, much like the seat bottom. With the seats removed, pull the carpet up off the retainers, and then forward off of the rear floor. You only need to expose some of the rear floor for drilling. You could optionally install the cage above the carpet, but I do not recommend it.
You will need to remove your seat belts in order to get the bar to go in- there just is not enough room to get them to sneak by, at least in the coupe. I forgot to document this, so this bit is after the fact. First, remove the trim cover by lifting up and pivoting the bottom of the trim outward.
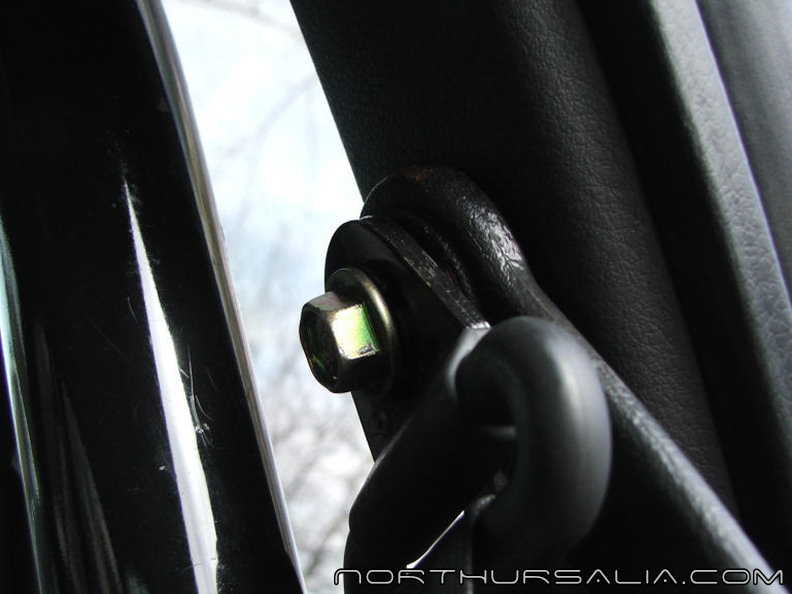
Next, remove this bolt with a 14mm socket and drop the belt out of the way.
You will notice there are no pics of me getting the cage in the car- I did this myself, and it was not possible to document it. First, remove the legs that go to the rear strut towers if you have them attached. Next, get as much room on either side of the car as you can. Essentially, you want to have enough room to open both your doors fully with probably 3 feet on either side for extra room. You want to put the "feet" of the cage into the front foot wells, with the hoop facing the rear (make a letter C with it, with the open side facing out the windshield. Keep this C level with the ground. Next, add the two legs to the bar, while keeping it level to the ground. Ideally, you would want to have help with this, but the cage does not weigh all that much, so it is possible to do on your own. Put the bolts/nuts through the legs and tighten a little to secure them, and then pivot the whole assembly into place. Pull the hoop of the cage up towards the roof and push the legs of the main hoop backwards. Eventually, the main hoop will graze the ceiling, the main legs will end up as far back as they can go, and the strut tower legs will sit on a nice flat spot. It will pretty much stay put on it's own now. To make your life easier, it would be best to set the car on jackstands high enough to allow the rear suspension to completely sag, allowing optimal access to the rear wheel wells and underside of the car to go ahead with the install.
This gives you an idea of how far back the main hoop legs will reach.
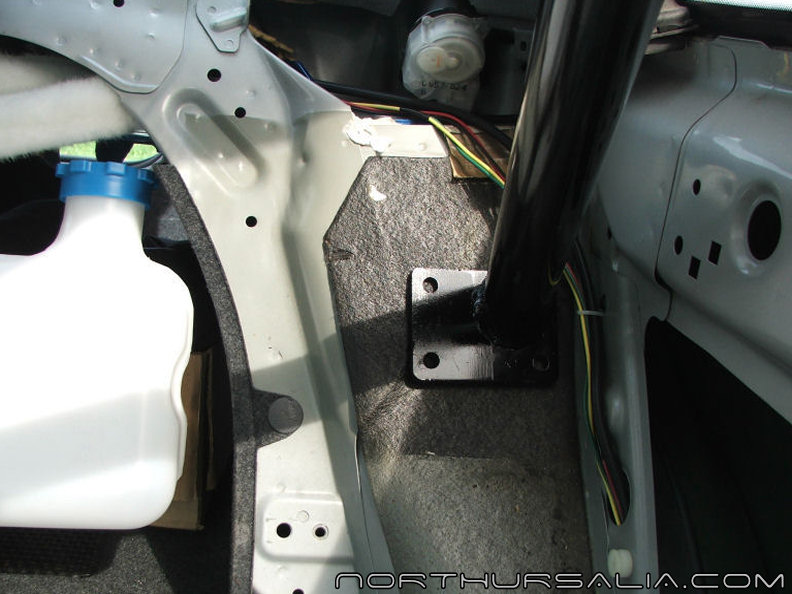
This is where the strut tower legs will end up.
Next, start drilling holes; you will need a 3/8" drill bit, and I recommend a brand new, self-centering metal drilling bit. A new bit will make for cleaner holes, and the self-centering bit will keep the bit from "walking" while you are trying to drill. After you drill one hole, throw a bolt in to keep the cage from moving around- it will make the install much easier if the holes line up the first time.
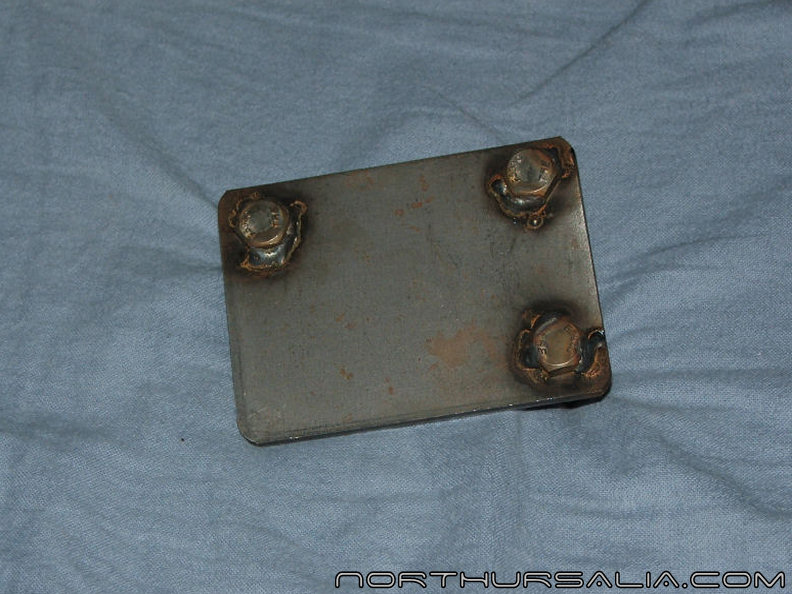
The kit comes with the bolts, nuts, and plates you need to install it, however I opted to replace all the hardware with stainless, as I live in the rust belt. Since I was doing this myself, I opted to weld the bolts to the plates as seen above, so I would not have to worry about trying to keep the bolt from moving while tightening the nut.
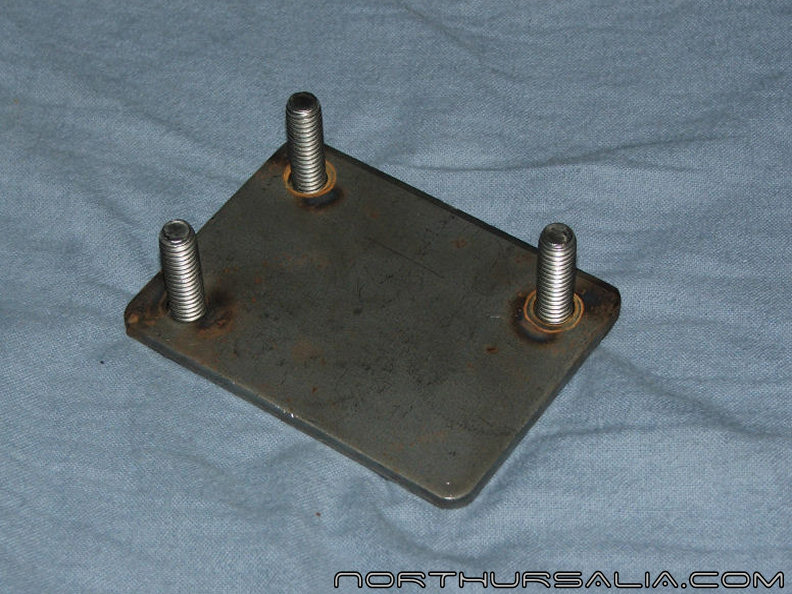
Just another view of the plate. Note that welding like this is not needed, but just made my life easier.

I covered the plates on both sides with POR-15, probably the best rust preventive paint on the planet (it stands for Paint Over Rust, and you can literally do that). This will keep these plates from ever being able to rust. This step is also not needed, but was for peace of mind. You can buy POR-15 many places, including on eBay, should you choose to cover the plates as I did.
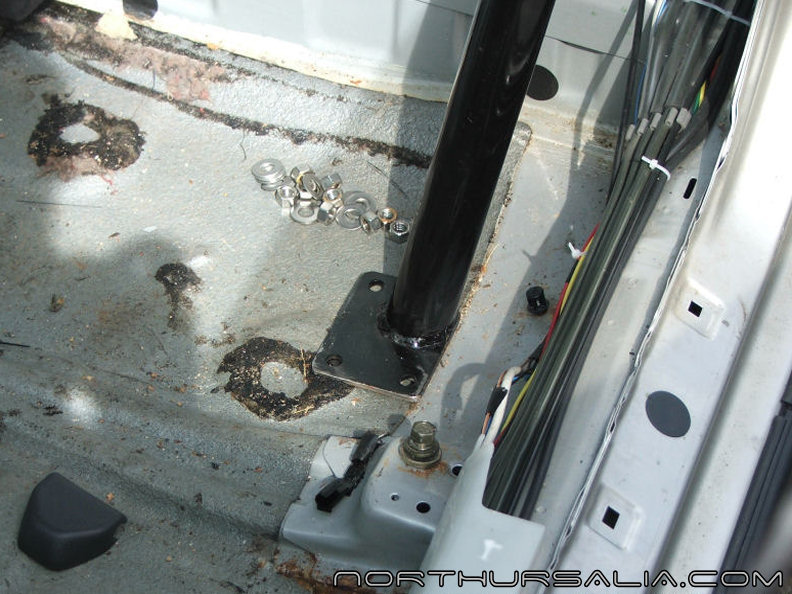
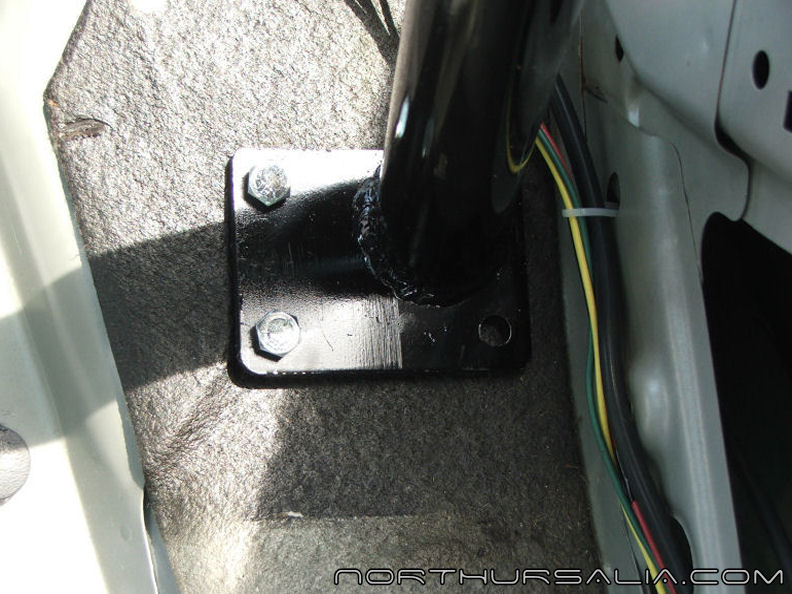
Next, push the plates from the outside to the inside and bolt them in place. The nuts and bolts that come with the kit are 14mm. I chose to seal the plates with 3M Ribbon Sealant (same thing you use to seal windshields and tail lamps) to ensure no outside elements get behind the plates. This step is also not needed, but is for my peace of mind.
Note: if you do not weld the plates like I did, you may wish to push the bolts through from the inside, which will make them not stick up so high inside and may make life easier. It is really up to you; being where I live, keeping the fasteners inside the car makes the most sense, in case I ever want to undo them in the future. The rust up here would prevent easy removal if I installed them with the nuts outside the car.
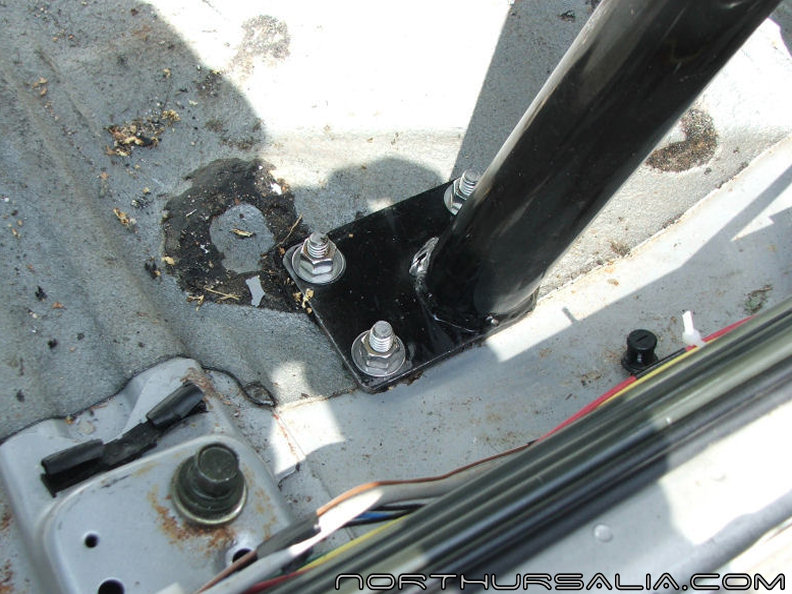
This is how far the bolts stick up- not that far, but I'm sure it will push the carpet up a bit.
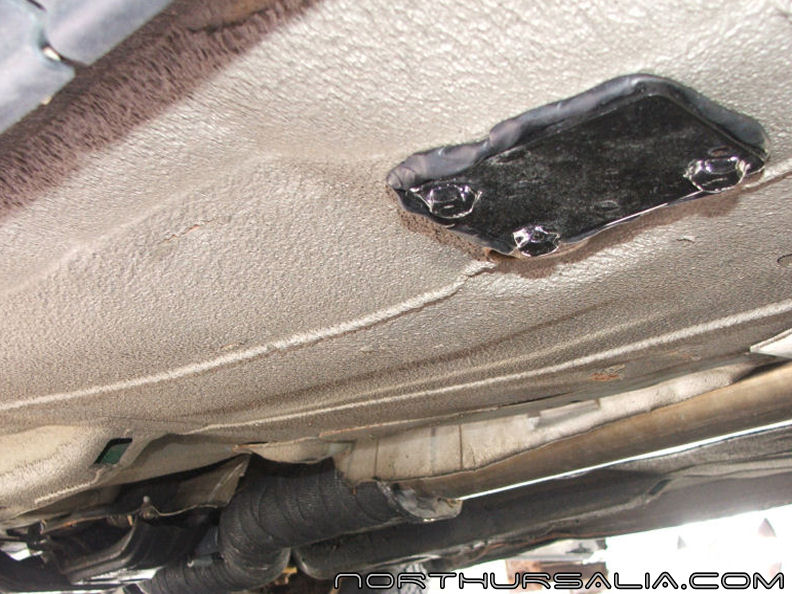
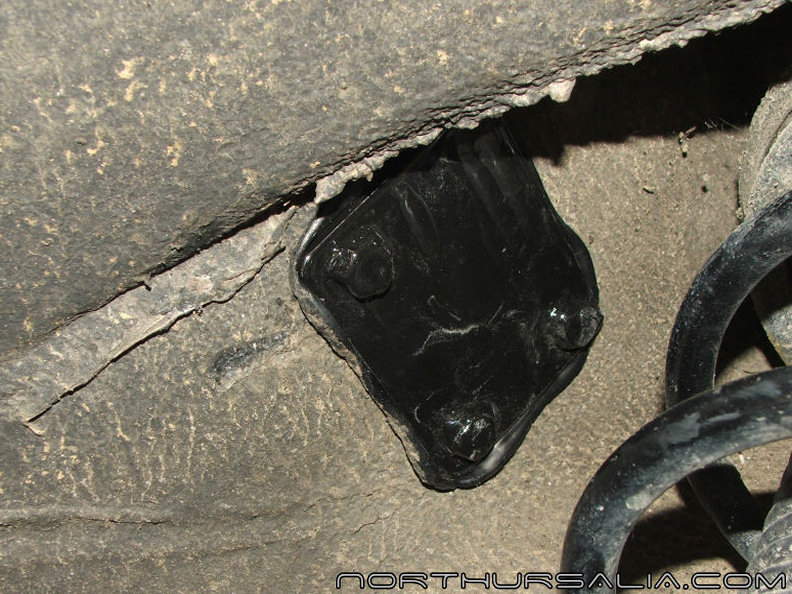
This is the plate under one of the main hoop legs, sealed the same way as the strut tower plate. I will eventually cover these over with rubberized undercoating as well- why kill it when you can overkill it!
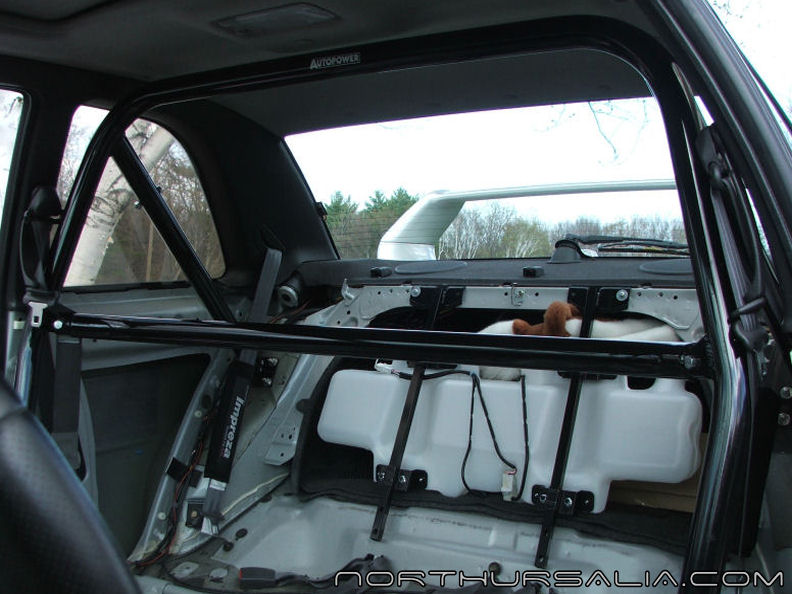
And the final product, installed.
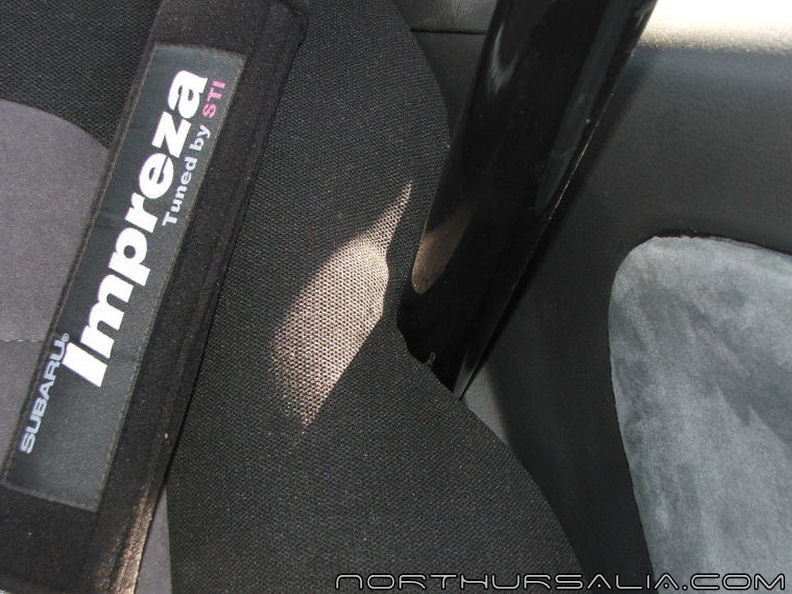
The last step will be to reinstall your carpet and seats; the rear seat will be a bit squished by the strut tower legs, but not too badly. I may in the future remove some of the foam so the seat will fit more snugly around the bar, but it is not a priority.
|
|
