This page gives detailed instructions on how to change the stock tail lamps on an Impreza wagon to the GF8 Kouki red/clear tail lamps. My OBS usually gets parts cast off of the RS (like the Legacy Turbo rear brakes) or free WRX parts (it has a WRX wagon suspension for example) so I figured it was time to do something nice for the car. Any questions or comments, please feel free to email me.
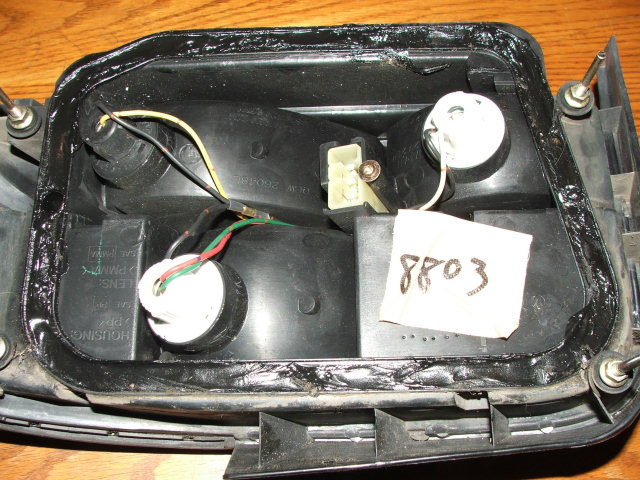
I purchased my tail lamps used on eBay, and got a very good deal by being patient. If you buy used tail lamps, save some aggravation and replace all of the bulbs- it will never be any easier than now. Next, clean up the sealant- you do not have to get all of this off, and in fact you may well get a better seal by leaving a little bit on there- just make sure it is clean, smooth, and free of dirt. You can skip this step if you buy them new. The factory sealant is ribbon sealer, commonly used for auto windshields. I strongly recommend using this sealant, as it is nearly idiot-proof. You can purchase a box from most automotive stores (AutoZone, NAPA, even Walmart) or you can probably buy some from a glass installer. It is made by 3M amongst others, and cost about $10 to $15 for a box.
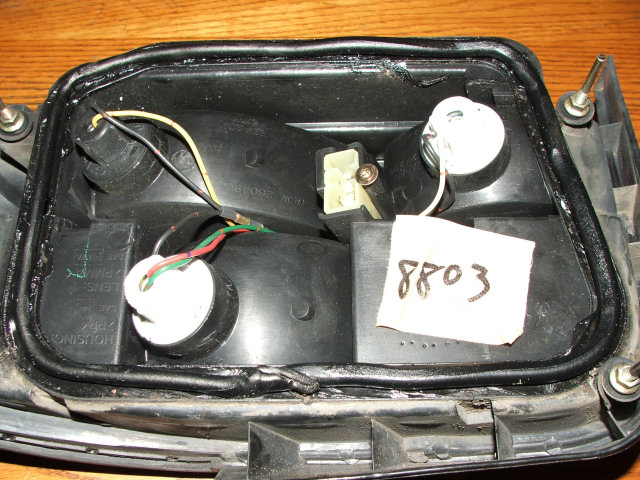
Here you can see the ribbon sealer- it is a round bead of very sticky black goop that is most easily applied using the backing that comes with it. Gently press a ring of the ribbon sealer around the lamp, making sure to fully join the ends to one another. This sealant makes the tail lamps watertight to the elements.
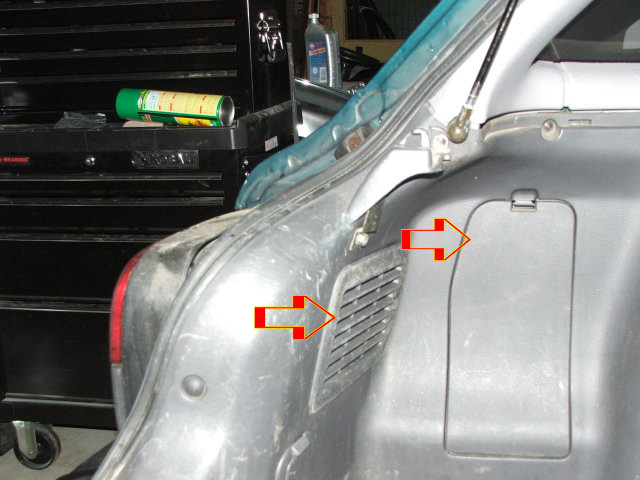
Now for the fun part. It is rather a pain to remove the interior trim to put these lights in (it is much easier on the sedan/coupe models, which makes me wonder why I haven't made a mod page on that yet as I've done about 4 intalls on them) so I did the driver side lamp through the access panels. Pop out the tail lamp bulb access panel and the take off the jack cover panel.

Here, you can see two of the five nuts that hold the lamp in. Two more are just out of view to the left of the opening.
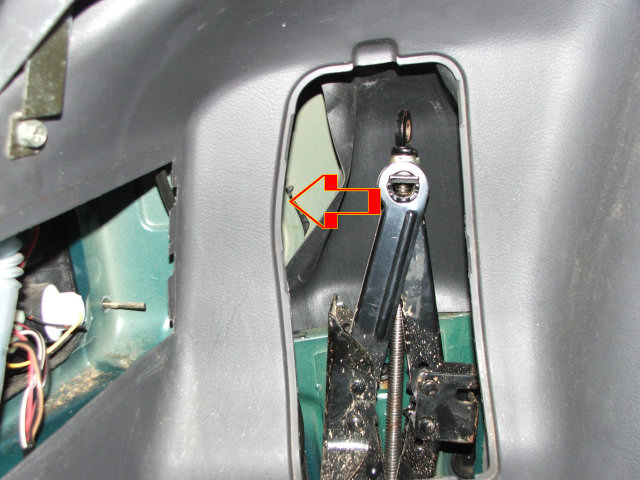
The last nut is easily accessed from right here. These nuts are 10mm, and you can use either a deep 10mm socket or a combination wrench to loosen them. Once loose (only about 1/4 to 1/2 turn) you can very easily spin the nuts off by hand. These nuts are well-protected from the elements and come apart easily.
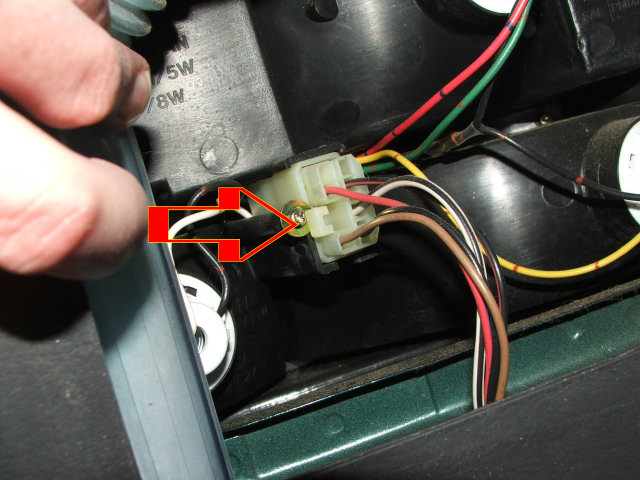
Next, push in on the lock and pop off the tail lamp harness connector. The lamp is ready to come out now.
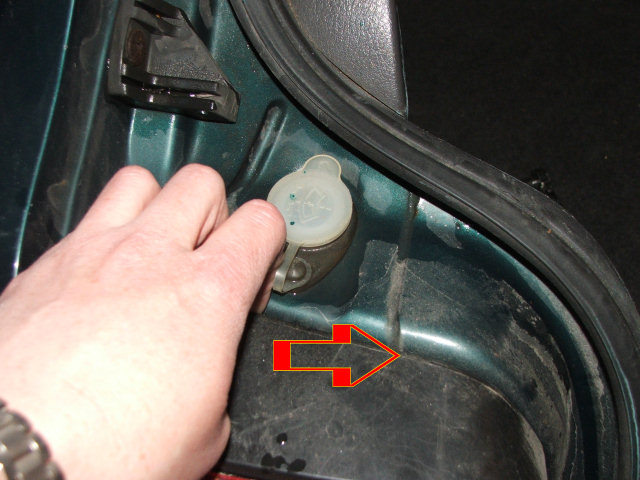
If you stick your fingers (or a flat head screwdriver) in this spot between the light and the body, you should be able to get a good hold on the lamp. Some tugging rearward all around the light should pop it free. You can try heating the goop to get it to release easier, but you should be able to pull it free without much trouble.
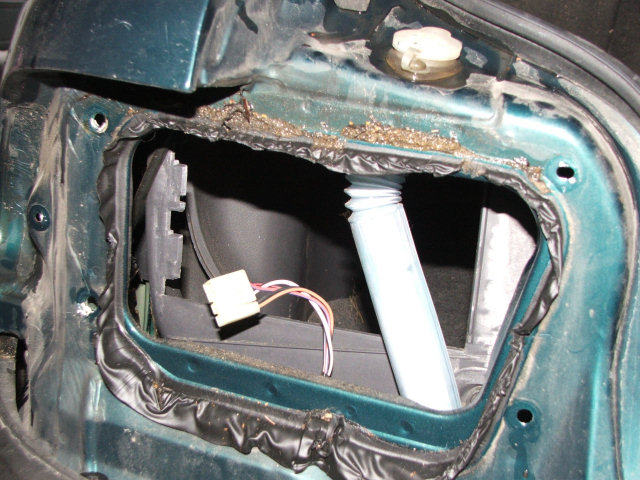
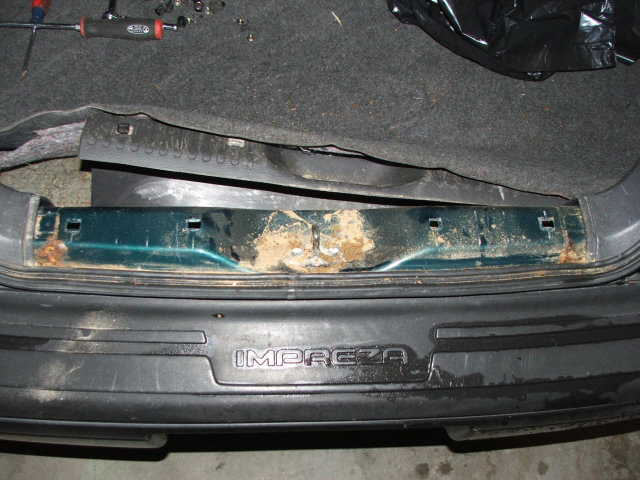
With the light out, you should have a bunch of sealant on the body and probably a bunch of crud towards the top, like I have in this photo. You will need to clean this all off very well- having extra sealant isn't a problem, but having water or dirt in it is detrimental to it sealing properly. Proper preparation prevents piss-poor performance here.
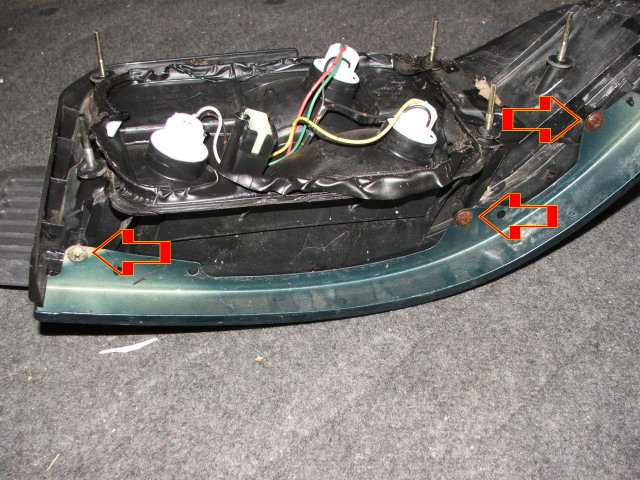
Next, you will need to swap the tail lamp trims over to the new lights. They are attached simply with 3 phillips screws. Remove them from your old lamps, and attach them to the new lamps. With the trim on, simply reverse the removal process- push the light into place, wiggle to get them seated properly, and tighten the nuts.
The passenger side lamp cannot be removed/installed as easily- there's no jack door on this side, and that fifth nut has to come off. Start by removing the four clips that hold the plastic scuff plate in place- they pop right out with a flat screwdriver. Depending on your year, you may have two more clips in the spare tire well that hold this on. My car being a New England car has to have rust somewhere on it, and I found it under here- I'll have to fix that soon.
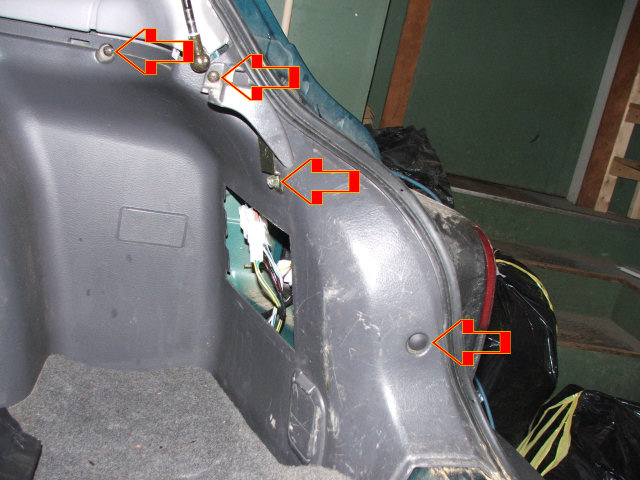
Next, starting at the upper left of this photo, you need to remove two phillips screws, one 10mm bolt, and one push clip. This is one of the two part clips where you need to get the head out first, then the body. Very common on the car, and if you are reading this, you probably already know how to remove them.
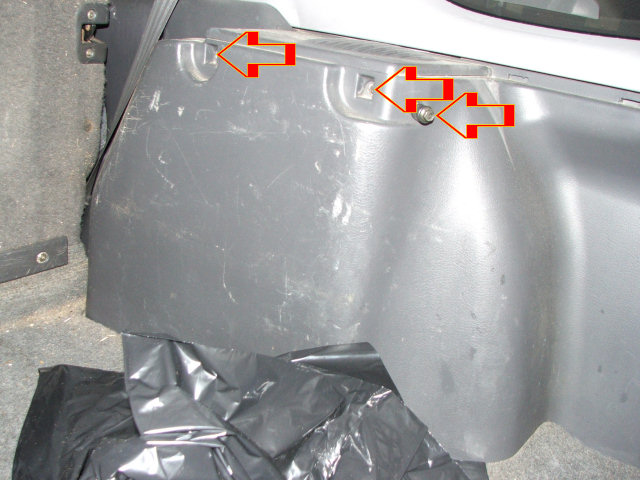
Next, two more phillips screws, and one more 10mm bolt (if you have the removeable rear trays like I do) have to come out. Next, push the seat to the "down" position and remove the tonneau cover if you have one. After this, the trim piece can pull away plenty far enough to repeat the process for the right side tail lamp.
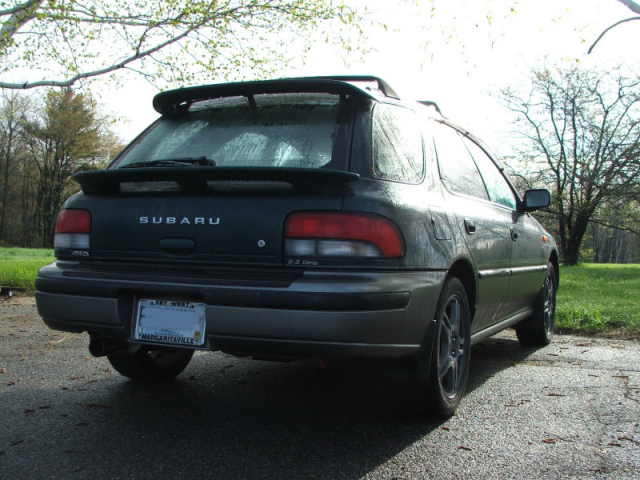
And here they are installed.
Standard Disclaimer: Modification of your car involves risks and may void your warranty. I can not be held responsible for the modifications you consciously decide to undertake nor for the results of doing so.
|
|
