This is an evolution of a page I did a few years back, in which I swapped the stock solid rear rotors for the stock-sized but vented 1990-1994 Legacy Turbo Sport Sedan/Wagon rear brakes, which may be found here. This time, I am adding the now available ridiculously large 11.4" vented rear brake setup from the 2005 Legacy GT Turbo models. These plus the 11.6" front 4 pots I already have should make braking distances quite a bit shorter and heat-induced fade much less likely. Please feel free to email and ask any questions. Comments are always welcome.
The part numbers you will need are:
26696AE040 Brake Pad Kit
26692AE040 Disk Brake Kit Rear Right
26692AE050 Disc Brake Kit Rear Left
26700AE080 Brake Disk Rear (need 2)
SubaruWRXParts.com can get you all the parts you will need, and they are familiar with the swap. You can reach them at SubaruWRXParts.com.
Apart from those parts, you will need a 14mm socket or open-ended wrench to remove the calipers and the brake banjo bolts, a 10mm socket or open ended wrench to bleed the brakes, brake fluid (you won't need much), a jack (a floor jack would be best but the stock jack will work), and a set of jackstands would be nice but aren't necessary. You should also invest in "the magic bolt." The magic bolt is an 8mm wide by about 2 inch long bolt used to pull rotors off of the hubs- it is $.35 you will wisely spend... trust me!
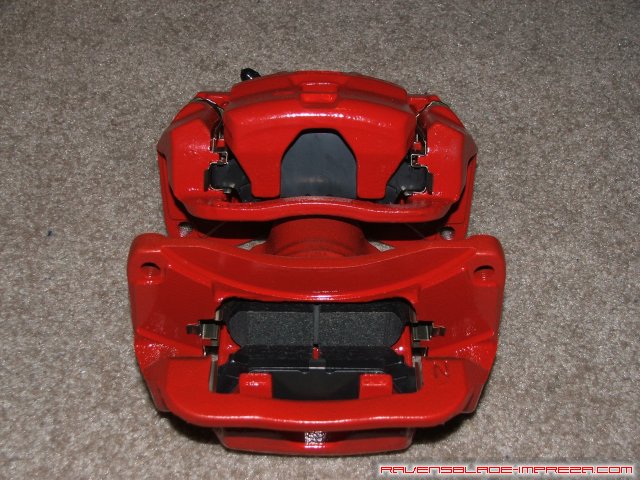
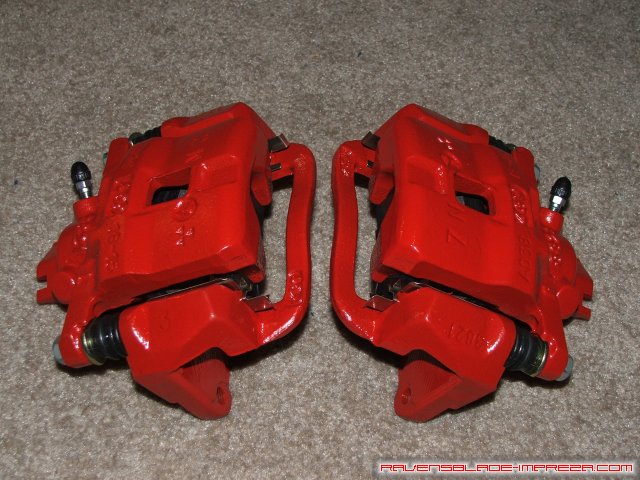

Just a few photos of the calipers loaded with the pads. The calipers will come the standard dark gray/green color, but I decided to paint mine red with VHT caliper paint, to match the 4 pot brakes I have up front from a 22B, which are also red and were also refinished with the same VHT paint. I'm not going to go into great detail about putting the pads in the calipers, as the pads will come with instructions and you can find detailed photographic instructions on this page of this website. The quick and the dirty is to put the slide clips in, put the single shim on the back of the pad with the anti squeal lubricant on both the back of the shim and the slide clips, and place them in the calipers.
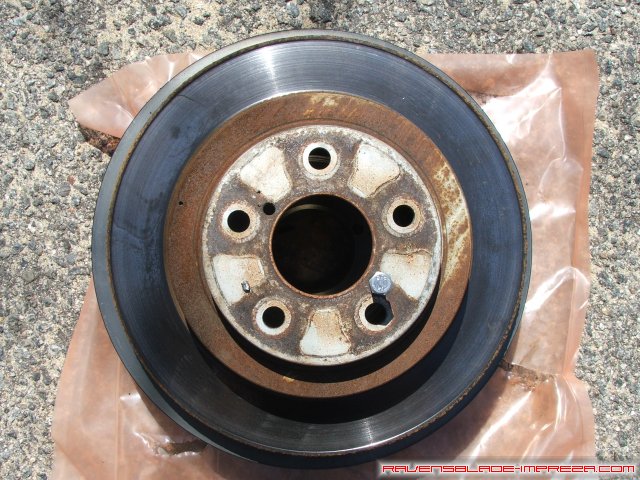
Just a comparison of the 1990-1994 Legacy Turbo vented rotor and the 2005 Legacy GT turbo rotor before we begin. You can see the magic bolt referenced earlier still in the old rotor. At this time, it would be good to jack the car up and then put the whole rear end up on jackstands.
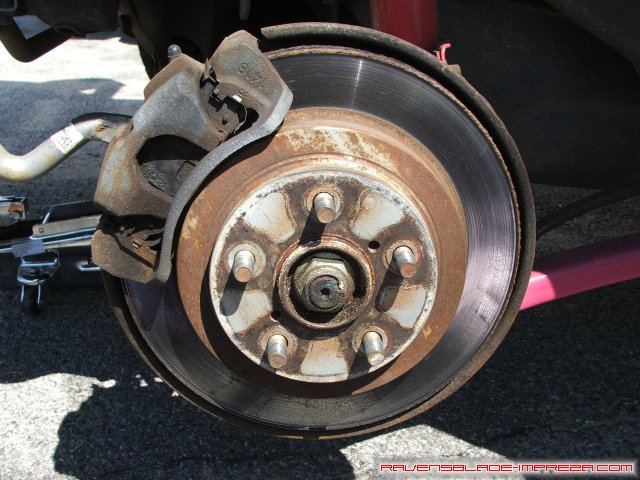
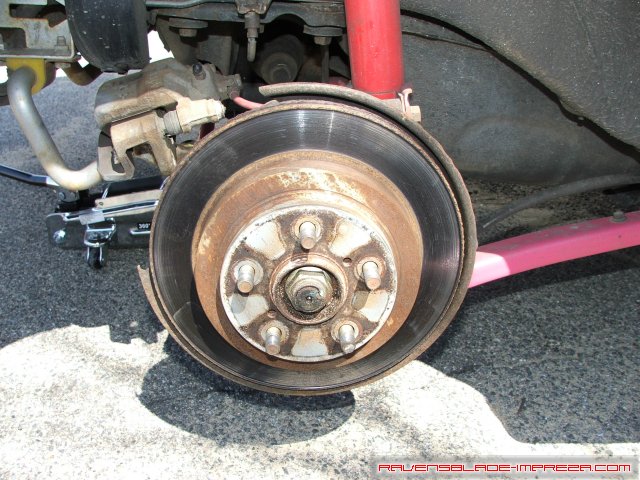
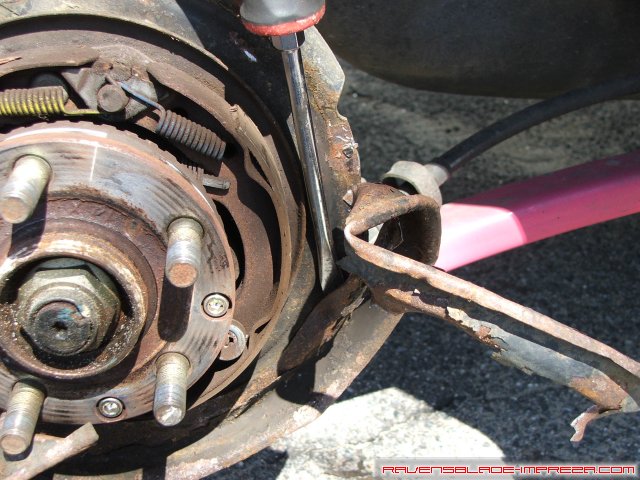
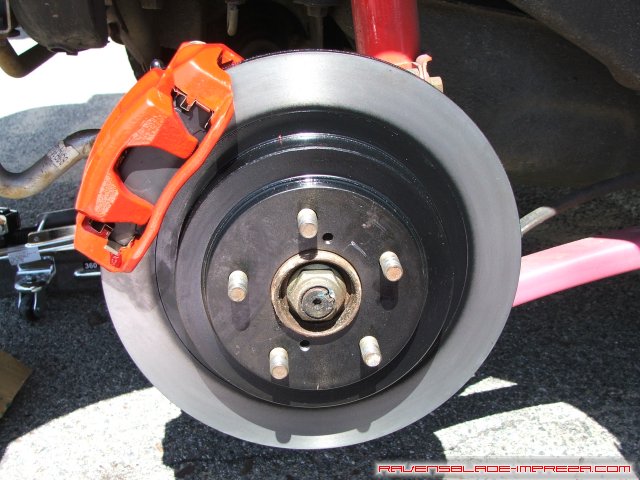
With the wheel off (5 19mm lugnuts) this is what we are presented with.
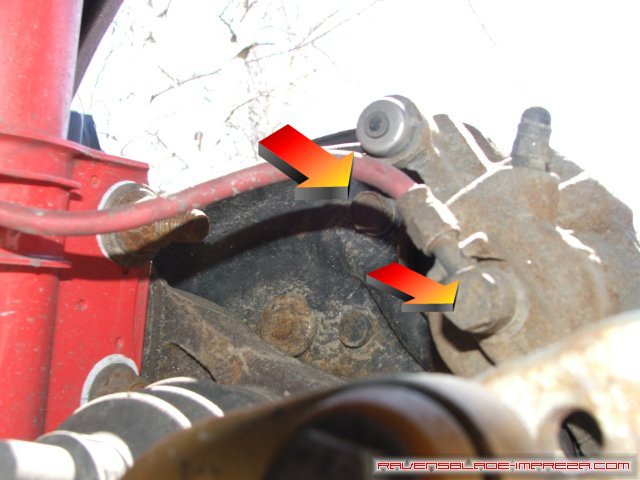
On the back of the caliper, you can see the three bits of hardware we will be removing. In this photo, you can see the top caliper bracket bolt (14mm) and the banjo bolt for the caliper (also 14mm). At this point, break the banjo bolt free and then snug it up a little again; this will make it easier to remove when we swap calipers. Remove the top bolt completely.

In this photo, you can see the bottom caliper bracket bolt (still 14mm). Remove this bolt completely as well.
With both bolts removed, wiggle the caliper free and place it somewhere safe that it will not pull on the brakeline- sitting it on top of the swaybar works well, as would on top of a can of paint.
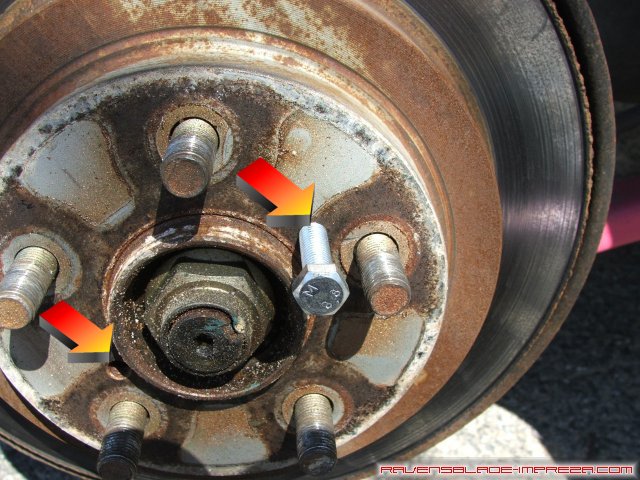
It is time to remove the rotor- if you are lucky, it will slide right off. If not, the magic bolt can be turned in the holes provided on the rotor hat to push them off- works like charm. Make sure the parking brake is not on for this step- it will be very hard to remove the rotor.
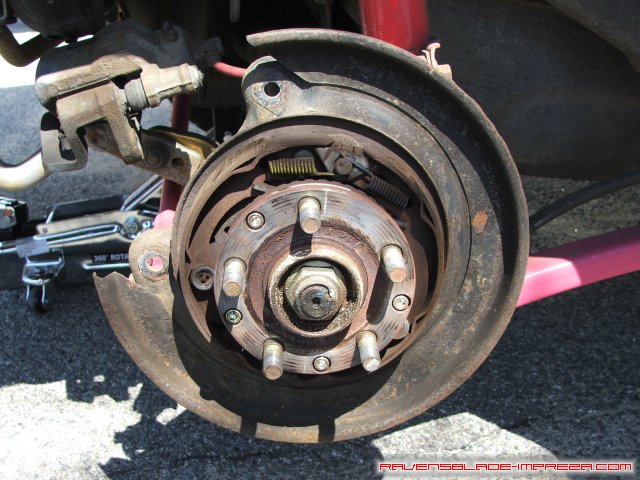
With the rotor off, you can now see the backing plate that will be in your way. It was designed for the smaller stock rotor, and either must be bent out of the way (hard to do), cut (easy if you have the tools), or removed completely (a screwdriver and a hammer and it is quickly done). I chose to remove them.
These are simply spot welded in 6 or 8 places, and a little prying and tapping with a screwdriver removes them in short order.
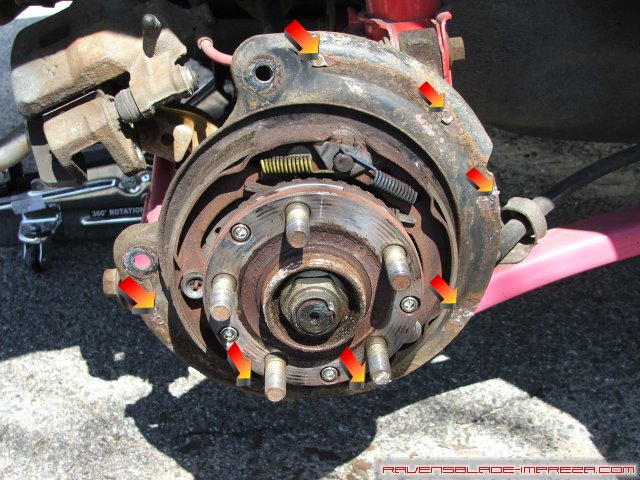
Make sure to tap down any burrs left from the spot welds, so they don't get in the way.
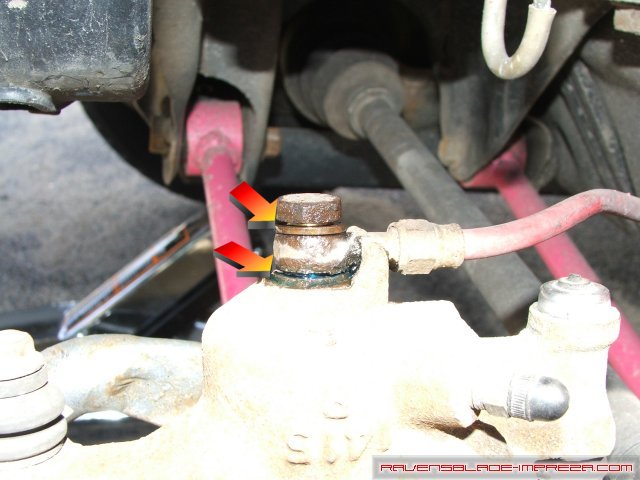
It is time to swap the calipers over. If you have a large piece of cardboard or some lawn trash bags, I'd recommend getting them to protect your driveway (and if you're like me, your control arms) from any leaking brake fluid- it is highly corrosive and good at stripping paint. Try to wipe up spills quickly. Now, take a good look at your stock caliper and the banjo bolt. You will notice there is a washer on either side of the bolt. These can be reused if you clean them up a little, or new ones can be purchased. Remove this bolt (again, 14mm), place the old caliper on the cardboard or trash bags, pick up the new caliper, and insert the banjo bolt and washers. Just make sure you remember there are two washers per caliper, and it must go bolt head -> washer -> brakeline -> washer -> caliper or you will get a leak. Start the banjo bolt by hand and do not go nuts on tightening it down, especially if they are old. You are liable to break one, like I did, as they are fragile and become more so with age.
The banjo bolt inserted into the new caliper and tightened snugly.
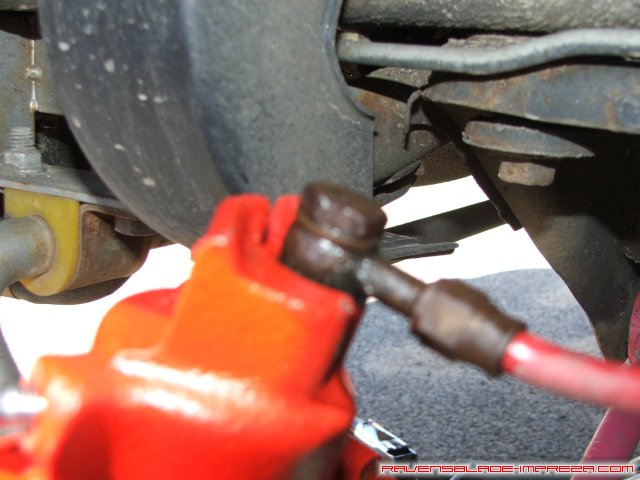
Push the new rotor onto the hub over the lug studs, slide the new caliper over the edge of the rotor, and reattach with the two 14mm caliper bolts removed earlier. Leave the wheel off, and repeat the above steps for the other side at this time.
At this point, you will need to bleed your brakes, as outlined for you here. After that, you will need to reattach your wheels and torque them down, then take the car out and bed in the brakes and pads. That is done by bringing the car up to about 20 or 30 miles per hour, then braking under normal pressure to about 5 miles per hour. Wait about 15 to 30 seconds, and then repeat. Do this 6 or 8 times, then park the car for about an hour to let the brakes cool down. This will help prevent warping of the rotors- though it is unlikely they will warp, it cannot hurt. I would suggest rebleeding the brakes approximately one week after doing this modification, to ensure all of the air in the brake system gets removed.
Standard Disclaimer: Modification of your car involves risks and may void your warranty. I can not be held responsible for the modifications you consciously decide to undertake nor for the results of doing so.
|
|
